batteries. (LR14) into the compartment with the correct polarity (+/-) as shown here. Install batteries before building models.
|
|
|
- Pedro Salazar Medina
- hace 7 años
- Vistas:
Transcripción
1

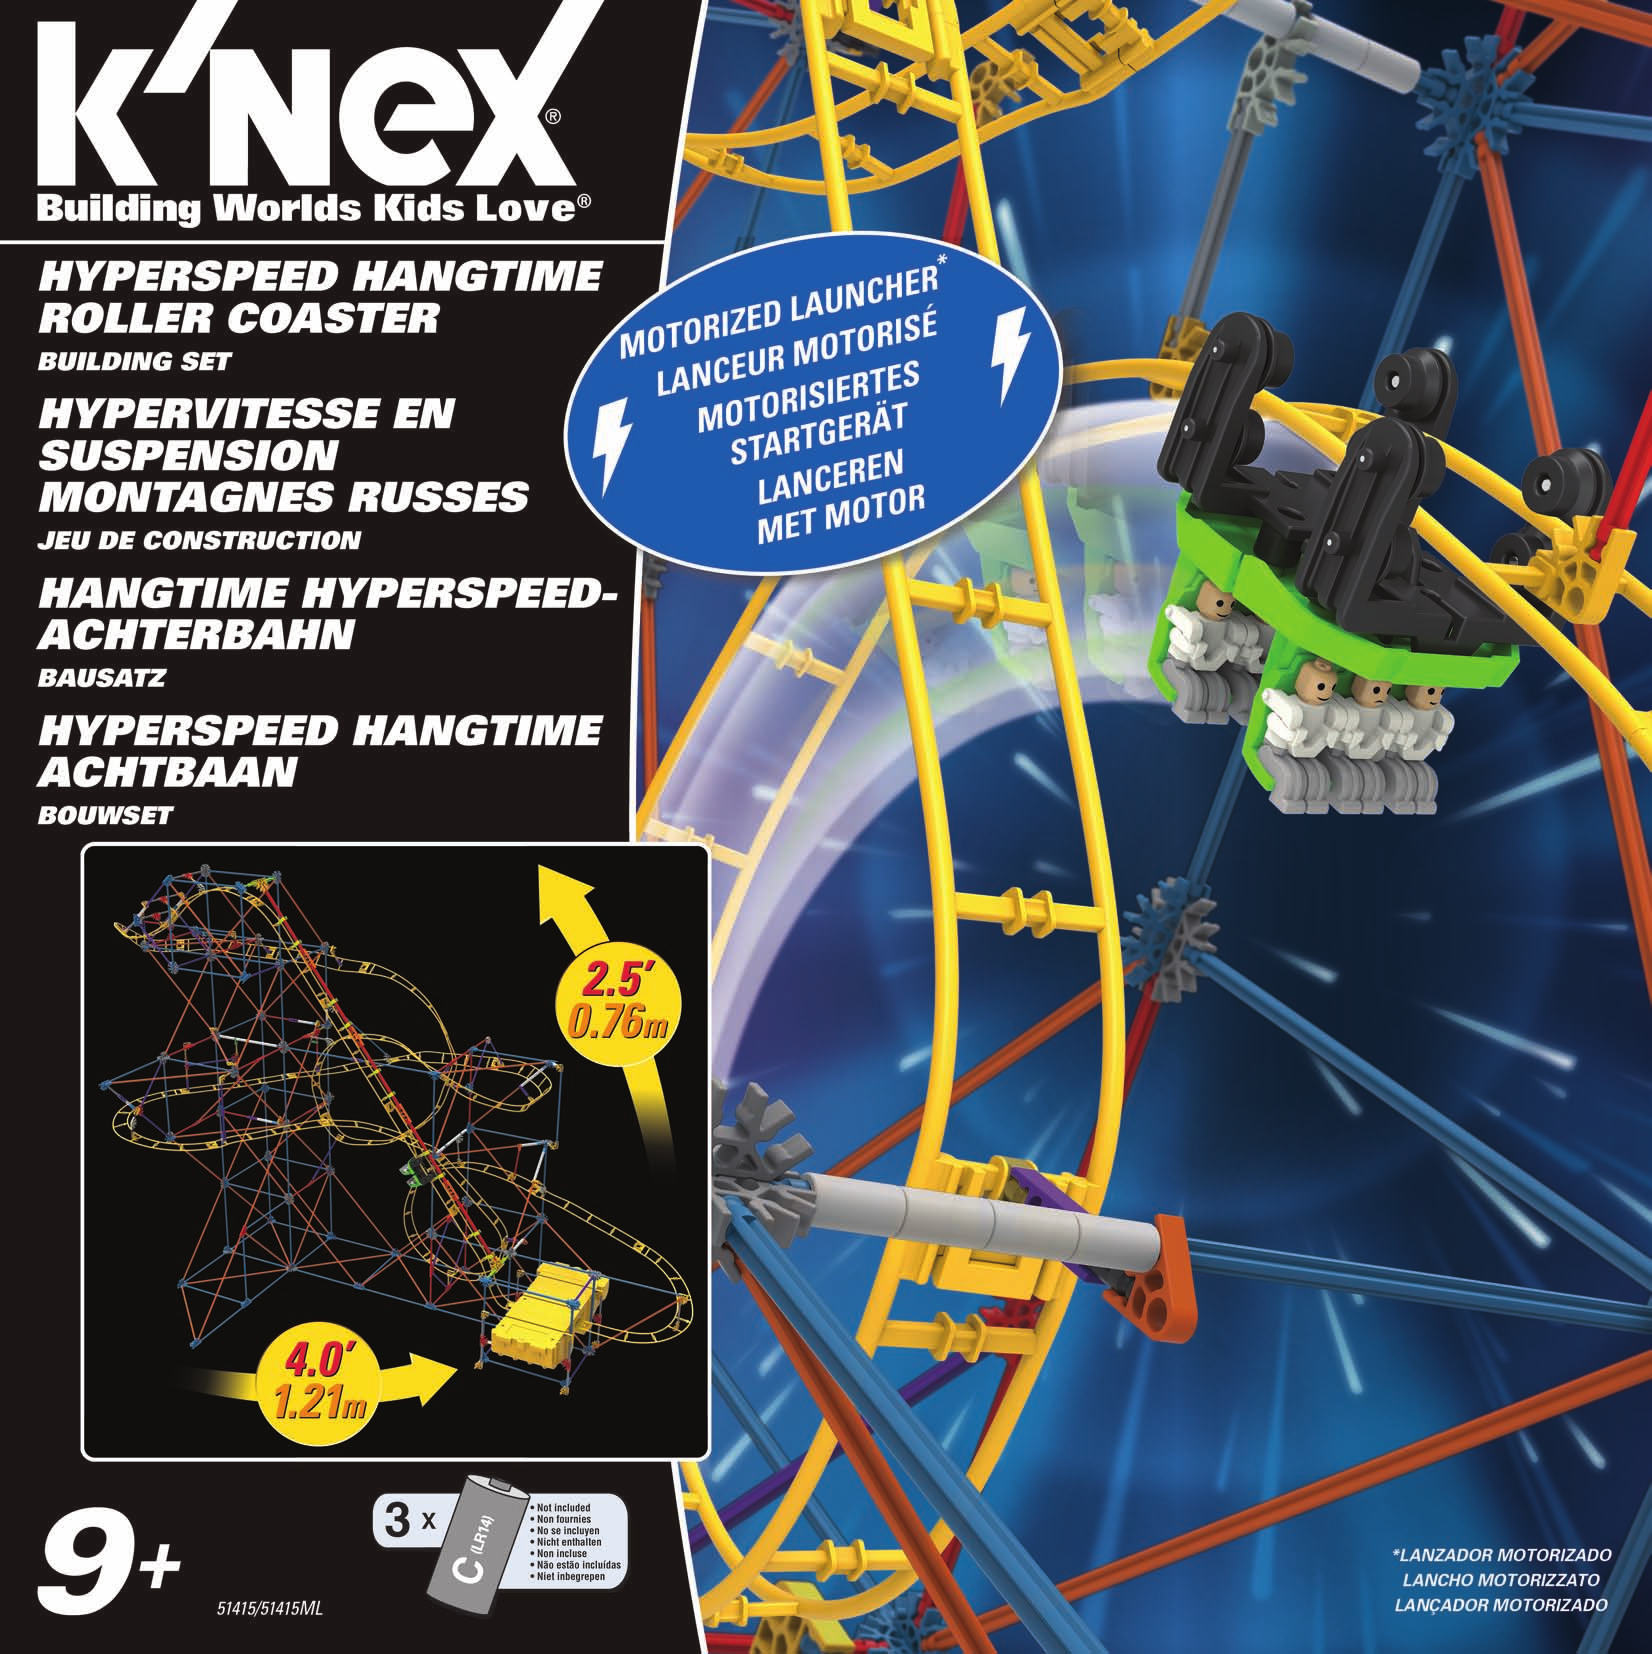
2 (EN) English CONTENTS K NEX Building Basics...6 Parts List...7 Meteor Madness...7 Hyperspeed Hangtime Roller Coaster...8 Tips and Troubleshooting Keep this important information for future reference Important Stuff for Parents and Kids WARNING: CHOKING HAZARD Small parts. Not for children under 3 years. CAUTION: Keep hands, face, hair and clothing away from all moving parts. CAUTION: Be careful not to tip the model over. Model should be placed on a flat and hard surface. Do not attempt to launch anything other than the coaster car. Do not obstruct track with objects or any part of your body. Share the K NEX experience with your child and make building with K NEX a family fun adventure. Take your time to enjoy the building process. Don t rush! While you re building make sure you face your model in the same direction as the pictures show in the instructions. Product and colors may vary. 2 Battery Information How to Insert and Remove Batteries Use a small Phillips head screwdriver to loosen the screw. Insert 3 fresh C batteries** (LR14) into the compartment with the correct polarity (+/-) as shown here. Install batteries before building models. ** Not included Go to + CAUTION: To Avoid Battery Leakage Insert batteries with correct polarity (+/-) as shown. Do not mix different types of batteries. Do not mix alkaline, standard (carbon-zinc) or rechargeable (nickelcadmium) batteries. Do not mix new and used batteries. Only batteries of the same or equivalent type recommended should be used. Remove exhausted batteries from the toy; do not short-circuit supply terminals. Remove all batteries if the toy will not be used for a long period of time. Important Tips Alkaline batteries are recommended. Rechargeable batteries are not recommended. Remove rechargeable batteries before recharging; they must be charged only under adult supervision. Non-rechargeable batteries must not be recharged. Keep components free of dust; do not immerse or use in water. Do not dispose of batteries in a fire; they could leak or explode and cause injury. The wheelie bin indicates this product cannot be disposed of with household waste due to presence of hazardous substances. To protect human health and environment, check your local authority for recycling advice and facilities (2012/19/EU, Europe only). for instruction updates + +
3 (FR) Français CONTENUS K NEX Bases de Construction...6 Liste des Pièces...7 Folie Météorique...7 Hypervitesse en Suspension Montagnes Russes...8 Conseils et Dépannage Gardez précieusement cette notice pour vous y référer ultérieurement Informations Importantes pour les Parents et les Enfants AVERTISSEMENT : RISQUE D ÉTOUFFEMENT Pièces de petite taille. Ne convient pas aux enfants de moins de 3 ans. ATTENTION : Garde les cheveux, les doigts, la figure et les vêtements à l écart de toutes les pièces mobiles. ATTENTION : Faire attention de ne pas renverser le modèle. Le modèle devrait être placé sur une surface plate et dure. Ne pas essayer de lancer autre chose que la voiture. Ne pas bloquer les rails avec des objets ou la corps. Partage l expérience K NEX avec ton enfant et fais du montage K NEX un agréable projet de famille. Prends ton temps lors du montage. Ne te presse pas. Essaye de situer ton modèle dans le même sens que les instructions durant le montage. Le produit et les couleurs peuvent varier. Allez à pour les mises à jour d instruction Informations sur les Piles Comment mettre et retirer des piles Utiliser un petit tournevis pour desserrer la vis et pour enlever le couvercle des piles. Insérer 3 piles C (LR14)** neuves dans le compartiment en respectant a polarité (+/-). Installe les piles avant de réaliser tes constructions. ** Non fournies + ATTENTION : Pour éviter la fuite des piles Insérez les piles en respectant la polarité (+/-) comme indiqué. Ne pas mélanger différents types de piles. Ne pas mélanger des piles alcalines avec des piles standard (carbonezinc), ou des piles rechargeables (au nickel-cadmium). Ne pas mélanger des piles neuves avec des piles usées. Il convient d utiliser uniquement des piles du type recommandé ou d un type équivalent. Retirer toujours les piles faibles ou mortes du produit ; ne pas faire court-circuiter les terminaux. Ne pas jeter les piles dans le feu ; elles risqueraient de fuir ou d exploser et d entraîner des blessures. Conseils Importants Les piles alcalines sont recommandées. Les piles rechargeables ne sont pas recommandées. Retirer les piles rechargeables du jouet avant de les recharger; elles doivent être chargées exclusivement en présence d un adulte. Les piles qui ne sont pas rechargeables ne doivent pas être rechargées. Veiller à ce que les éléments restent à l abri de la poussière ; ne pas les plonger ni les utiliser dans l eau. Ne pas jeter les piles dans le feu ; elles risqueraient de fuir ou d exploser et d entraîner des blessures. Le symbole poubelle à roulettes indique que ce produit ne peut pas être éliminé avec vos déchets ménagers en raison de la présence de substances dangereuses. Afin de protéger votre santé et l environnement, renseignez-vous auprès de vos autorités locales afin d obtenir des conseils sur le recyclage et la localisation des installations adaptées (2012/19/EU, Europe uniquement)

4 (DE) Deutsch INHALT Grundlegende Bauanleitungen für K NEX...6 Teileliste...7 Meteor-Wahnsinn...7 Hangtime Hyperspeed-Achterbahn...8 Tipps und Fehlerbehebungen Informationen für später aufbewahren Was Eltern und Kinder unbedingt wissen sollten ACHTUNG: ERSTICKUNGSGEFAHR Kleinteile. Nicht geeignetfür Kinder unter 3 Jahren. VORSICHT: Die Haare des Kindes können in Kontakt mit bewegenden Teilen des Spielzeugs kommen und sich verfangen. VORSICHT: Haare, Finger, Gesicht und Kleidungsstücke nicht mit beweglichen Teilen in Berührung kommen lassen. Versuche nicht, andere wagen zu starten. Die Schienen dürfen nicht blockiert oder mit dem Körper verdeckt werden. Helfen Sie Ihrem Kind beim Bauen mit K NEX und machen Sie aus diesem Bauprojekt ein Abenteuer mit Spaß und guter Laune für die gesamte Familie. Das Zusammenbauen macht Spaß, also nehmen Sie sich Zeit und hetzen Sie nicht! Versuche, dein Modell beim Zusammenbauen so zu orientieren, dass es in die gleiche Richtung weist, wie es in den Anleitungen beschrieben und gezeigt wird. Die Produkte und Farben unterscheiden sich eventuell von denen auf den Abbildungen. 4 Informationen zu den Batterien Anweisungen zum Einlegen und Entfernen der Batterien Einen kleinen Kreuzkopfschraubenzieher benutzen, um die Schraube zu lösen und die Batterieabdeckung zu entfernen. 3 frische C (oder LR14) Batterien** in den Batterieraum mit der korrekten Polarität einsetzen (+/-). Batterien vor dem Bau der Modelle einsetzen. ** Nicht enthalten Wichtige Tipps + VORSICHT: Um ein Auslaufen der Battterien zu vermeiden Beim Einlegen der Batterien auf die korrekte Polarität (+/-), wie dargestellt, achten. Keine Batterien unterschiedlichen Typs mischen. Keine alkaline Batterien, Standard-Batterien (Kohle-Zink) oder wiederaufladbare Batterien (Nickel-Cadmium) mischen. Keine alten und neuen Batterien mischen. Nur Batterien des gleichen Typs oder empfohlenen äquivalenten Typs verwenden. Leere oder verbrauchte Batterien aus dem Spielzeug entfernen; darauf achten, dass die Pole der Batterie nicht kurzgeschlossen werden. Wenn das Spielzeug längere Zeit nicht verwendet werden soll, alle Batterien entfernen. Alkaline Batterien werden empfohlen. Wiederaufladbare Batterien sind nicht empfohlen. Bei Verwendung von wiederaufladbaren Batterien müssen diese aus dem Spielzeug entfernt werden, bevor sie wieder aufgeladen werden; das Wiederaufladen darf nur unter Aufsicht eines Erwachsenen stattfinden. Nichtwiederaufladbare Batterien dürfen nicht wieder aufgeladen werden. Die Komponenten von Staub freihalten; nicht in Wasser tauchen. Zu entsorgende Batterien nicht ins Feuer werfen; sie können auslaufen oder explodieren und Körperverletzungen verursachen. Der Abfallbehälter zeigt an, dass dieses Produkt aufgrund von Gefahrstoffen nicht im normalen Hausmüll entsorgt werden kann. Zum Schutz von Gesundheit und Umwelt kontaktiere bitte deine lokale Behörden für Recyclingtipps und einrichtungen (2012/19/EU, nur Europa). Aktualisierte Anleitungen findest du bei + +
5 (NL) Nederlands INHOUD Basisstappen voor K NEX bouwen...6 Onderdelenlijst...7 Mega-Meteoor...7 Hyperspeed Hangtime Achtbaan...8 Tips & Oplossen van Problemen Bewaar deze belangrijke informatie, zodat u deze in de toekomst opnieuw kunt raadplegen Belangrijke Gegevens voor Ouders en Kinderen WAARSCHUWING: VERSTIKKINGSGEVAAR - Kleine onderdelen. Niet geschikt voor kinderen jonger dan 3 jaar. OPGEPAST: Houd handen, haar, gezicht en kleding uit de buurt van bewegende onderdelen. OPGEPAST: Als het haar van het kind in aanraking komt met bewegende onderdelen van het speelgoed kan het haar verstrikt raken. Niet trachten iets te lanceren dat niet de wagen is. Het spoor niet versperren met objecten of met een deel van je lichaam. Deel de K NEX ondervinding met je kind en maak van het bouwen met K NEX een aangenaam familieavontuur. Neem je tijd tijdens het bouwen en monteren. Spoed je niet! Tracht je model in dezelfde richting te plaatsen als de aanwijzingen terwijl je bouwt en monteert. Produkt en kleuren kunnen afwijken. Informatie over Batterijen Batterijen plaatsen en verwijderen Gebruik een kleine kruiskopschroevendraaier om de schroef van het klepje los te draaien. Plaats 3 nieuwe C-batterijen** (LR14) in het batterijvak en let daarbij op de polariteit (+/-), zoals hier wordt getoond. Plaats de batterijen voordat je een model bouwt. ** Niet inbegrepen + OPGEPAST: Voorkom lekkende batterijen Let op de polariteit bij het plaatsen van batterijen (+/-), zoals wordt getoond. Gebruik geen verschillende typen batterijen samen. Gebruik geen alkaline, gewone (koolstof-zink) of oplaadbare (nikkelcadmium) batterijen samen. Gebruik geen nieuwe en gebruikte batterijen samen. Gebruik uitsluitend batterijen van het aanbevolen type of van een gelijkwaardig type. Verwijder lege batterijen uit het speelgoed. Vermijd kortsluiting. Verwijder de batterijen uit het speelgoed als het langere tijd niet wordt gebruikt. Belangrijke tips Alkalinebatterijen worden aanbevolen. Oplaadbare batterijen worden niet aanbevolen. Verwijder oplaadbare batterijen voordat u ze oplaadt. Het opladen mag uitsluitend gebeuren onder toezicht van een volwassene. Niet-oplaadbare batterijen mogen niet worden opgeladen. Houd de onderdelen stofvrij. Niet in water dompelen of gebruiken. Gooi batterijen niet in het vuur. Ze kunnen lekken of exploderen en schade veroorzaken. Het pictogram van een verrijdbare vuilnisbak geeft weer dat dit product niet samen met het gewone huis-, tuin- en keukenafval mag worden weggegooid, omdat het gevaarlijke substanties bevat. Bescherm gezondheid en milieu en vraag advies aan de plaatselijke afvalverwerkingsdienst over hoe en waar u producten kunt recyclen (2012/19/EU, alleen Europa). voor Bijwerkingen voor aanwijzingen + + 5

6 K NEX Building Basics Bases de Construction K NEX Grundlegende Bauanleitungen für K NEX Bouwen met K NEX Start Building To begin your model, find the 1 and follow the numbers. Each piece has its own shape and color. Just look at the pictures, find the pieces in your set that match and then connect them together. Try to face your model in the same direction as the instructions while you build. The arrows show you where the parts connect, but not all connections points have arrows. Faded colors show you this section is already built. Démarre ta Construction Pour commencer le modèle, cherche l étape numéro 1 et suis les numéros dans l ordre. Chaque pièce a sa propre forme et sa propre couleur. Regarde les illustrations, trouve les pièces qui y correspondent et les assemble-les. Pour te faciliter la tâche, oriente le modèle dans le même sens que les instructions. Les flèches indiquent où les pièces s assemblent, mais les points de raccorde ment n ont pas tous des flèches. Les pièces ayant une couleur estompée sont celles déjà assemblées. Los geht s mit dem Bauen Um mit dem Bauen deines Modells zu beginnen, suche die Nummer 1 und folge den laufenden Nummern. Jedes Teil hat seine eigene Form und Farbe. Schau dir einfach die Abbildungen an, such die Teile in deinem Bausatz, die so aussehen wie das, was du auf der Abbildung siehst und steck sie ineinander. Versuche, dein Modell beim Zusammenbauen so zu orientieren, dass es in die gleiche Richtung weist, wie es in den Anleitungen beschrieben und gezeigt wird. Blasse Farben weisen darauf hin, dass dieser Streckenabschnitt bereits zusammengebaut ist. Begin te bouwen Om met je model te beginnen, vind eerst het nummer 1 en volg de nummers. Elk stuk heeft zijn eigen vorm en kleur. Kijk gewoonweg naar de afbeeldingen, vind de overeenstemmende stukken terug in je geheel en maak ze aan mekaar vast. Tracht je model in dezelfde richting te plaatsen als de aanwijzingen terwijl je bouwt en monteert. De vervaagde kleuren duiden aan dat dit deel reeds is opgebouwd. Gelieve het nieuwe deel vast te koppelen op de plaats aangeduid door de pijlen Connectors You can slide these special connectors together. Push tightly until you hear a click. Pay close attention to the instructions and position them horizontally or vertically exactly as they are shown. Connecteurs Tu peux assembler ces connecteurs spéciaux en les faisant glisser l un dans l autre. Pousse fort jusqu à entendre un «clic». Lis attentivement les instructions et positionne-les horizontalement ou verticalement, en suivant exactement les illustrations. Verbindungsstücke Blaue und silberfarbene Verbindungsstücke haben besonders lange Schlitze. Wie du auf der Abbildung sehen kannst, lassen sie sich ineinander schieben. Achte beim Aneinanderfügen dieser Teile darauf, dass du ein Klickgeräusch hörst. Erst dann sind die Teile fest miteinander verbunden. Verbindingsstukken Je kunt deze speciale verbindingsstukken in elkaar steken. Duw ze stevig tegen elkaar aan tot je een klik hoort. Let goed op de instructies en plaats ze horizontaal en verticaal, precies zoals wordt getoond. Spacers There are places in your model where you need to add spacers. Be sure to use the correct number of spacers shown in the instructions. Séparateurs Il y a des endroits sur le modèle où des séparateurs sont nécessaires. Assure-toi d utiliser la bonne couleur et le nombre de séparateurs, comme indiqué sur les instructions. Abstandsstücke An manchen Stellen in deinem Modell musst du Abstandsstücke einbauen. Achte darauf, die richtige Farbe und Anzahl von Abstandsstücken wie in der Anleitung gezeigt zu verwenden. Afstandhouders Op bepaalde plekken van je model moet je afstandhouders gebruiken. Zorg dat je het juiste aantal afstandhouders gebruikt, zoals wordt getoond in de instructies. 6 Motor Car will go in the direction of the arrows on top of the motor. Always wait a few seconds after turning the motor on before gently pushing the car towards the motor. Moteur La direction de la voiture correspond à l orientation de la haut sur le moteur. Toujours attendre quelques secondes après avoir démarré le moteur avant de pousser doucement la voiture vers le moteur. Motor Der Pfeil auf dem Motor deutet die Richtung an, in die sich das wagen bewegt.nach dem Drehen des Motors immer warten, an vor das Auto in Richtung zum Motor einige Sekunden leicht drücken. Motor De wagen rijdt in de richting van de pijl op de motor. Wacht altijd een paar seconden na het aanzetten van de motor vóór zacht het duwen van de auto naar de motor.

7 Parts List Before you start building, be sure to compare the parts in your set with the parts list here. If anything is missing, call or write to us using the information on the back cover. We are here to help you! Liste des Pièces Avant de commencer à construire, assure-toi de comparer les pièces dans ta boîte à la liste de pièces fournie ici. S il manque quelque chose, téléphone-nous ou écris-nous en te servant des informations figurant au verso de la notice. Nous sommes là pour t aider! Teileliste Bevor du mit dem Bauen anfängst, solltest du prüfen, ob die Teile in deinem Bausatz mit denen auf dieser Teileliste übereinstimmen. Falls etwas fehlt, rufe uns an oder schreibe uns (siehe Rückseite). Wir sind für dich da! Lijst met onderdelen Controleer aan de hand van deze lijst of je set alle onderdelen bevat voordat je begint te bouwen. Als er een onderdeel ontbreekt, bel of schrijf ons dan. Je vindt onze gegevens op de achterkant. We helpen je graag! METEOR MADNESS FOLIE MÉTÉORIQUE METEOR-WAHNSINN MEGA-METEOOR Alternate Model Modèle Alternatif Alternatives Modell Alternatief Model Bonus instructions at Plans supplementaires á Zusätzliche Bauanleitungen bei De instructies van de bonus bij 7
8 HYPERSPEED HANGTIME ROLLER COASTER HYPERVITESSE EN SUSPENSION MONTAGNES RUSSES HANGTIME HYPERSPEED- ACHTERBAHN HYPERSPEED HANGTIME ACHTBAAN WARNING: CHOKING HAZARD Small parts. Not for children under 3 years. ATTENTION : RISQUE D ÉTOUFFEMENT Pièces de petite taille. Ne convient pas aux enfants de moins de 3 ans. ACHTUNG: ERSTICKUNGSGEFAHR Kleinteile. Nicht geeignet für Kinder unter 3 Jahren. WAARSCHUWING: INSLIKKINGSGEVAAR Kleine onderdelen. Niet geschikt voor kinderen jonger dan 3 jaar
9
10

11
12
13 11 10 x11 x

14

15

16 x6 x
 dans le moteur? Hast du 3 C (oder LR14) Batterien in den Motor eingelegt?")
17 Did you install 3 C (or LR14) batteries in the motor? Est-ce que tu as installé 3 piles C (ou LR14) dans le moteur? Hast du 3 C (oder LR14) Batterien in den Motor eingelegt? Heb je er 3 C (of LR14) batterijen ingestoken?
18
19

20
21 27 x

22 28 Be sure to push the connectors on firmly until they click. Pousse bien les connecteurs jusqu à ce qu ils «cliquent». Achten Sie darauf, die Anschlüsse auf fest drücken, bis sie Klick. Druk de koppelstukken goed erin tot ze klikken
23 30 Always connect the track top side to top side throughout the build. Connecte toujours le côté supérieur du circuit contrele côté supérieur tout au long de la construction. Die einzelnen Schienenstücke müssen immer mit der Oberseite nach oben zeigen, wenn sie miteinander verbunden werden. Maak steeds de bovenkant van het spoor vast aan de bovenkant tijdens de opbouw Always join this end of the track to the previous track piece first, then connect the rest of the track to the tower. Toujours joindre à cette extrémité de la voie à la pièce de la piste précédente, puis connecter le reste de la piste à la tour. Immer beitreten dieses Ende der Strecke zum vorherigen Track Stück zuerst, dann treten der Rest der Strecke auf den Turm. Altijd deelnemen aan deze eind van het spoor naar de vorige track stuk eerst, dan komen de rest van de track naar de toren. 23
24

25

26

27

28

29

30

31

32

33

34

35

36

37

38 60 To attach the car, undo a piece of track and then thread the car wheels over the top side of the track. Then join the track pieces together. If the car gets stuck on the way down, make sure it is not hitting any K NEX parts. Pour fixer les voiture, défais un tronçon du circuit, puis fais passer les roues de la voiture par-dessus le côté supérieur du circuit. Assemble ensuite les tronçons du circuit. Si des voiture restent coincées au cours de la descente, vérifie que la voiture ne heurte pas des pièces K NEX. Die wagen werden eingehängt, indem ein schienenstück entfernt wird. Dann kannst du die räder des wagens an der oberseite der schienen einhängen. Die schienenstücke werden dann wieder miteinander verbunden. Falls die wagen bei der Abfahrt stecken bleiben, überprüfe, ob der wagen gegen einzelne bauteile stößt. Om de wagen vast te maken, maak een stuk spoor los en breng dan de wielen van de wagen aan over de bovenkant van het spoor. Maak vervolgens de spoorstukken aan mekaar vast. Wanneer wagens vastlopen tijdens de daling, verzeker je ervan dat de wagen tegen geen K NEX onderdelen aanloopt. Car must travel in the direction shown. La voiture doit se déplacer dans le sens indiqué. Die Wagen müssen in die gezeigte Richtung bewegt werden. De wagen moet zich verplaatsen in de aangeduide richting Tips and Troubleshooting If the motor is not working properly: Check to see if you have fresh batteries and that they are installed correctly. If it is still not working, call our Consumer Hotline at KID-KNEX (USA and Canada only). See the back cover for other ways to contact K NEX. If the car gets stuck on the track: Is the model built correctly? Make sure the car is not hitting any K NEX parts. Are the track pieces connected properly? Is the car attached to the track correctly? Adjust the track to eliminate any flat or little bumpy spots on the track. Cobseils et Dépannage Si le moteur ne marche pas : Vérifie que tu as des piles neuves et qu elles sont installées correctement. Si ça ne marche toujours pas, appelle notre ligne d assistance à la clientèle à KID-KNEX (USA et Canada uniquement). Regarde au verso pour d autres moyens de contacter K NEX. Si des voitures restent coincées au cours de la descente : Est-ce que le modèle est construit comme il faut? Vérifie que la voiture ne heurte pas des pièces K NEX. Est-ce que les pièces du circuit sont connectées comme il faut? Est-ce que la voiture est fixée au circuit comme il faut? Ajuste le circuit de façon à y éliminer des endroits plats. Tipps und Fehlerbehebungen Falls der Motor nicht funktionieren: Überprüfe, ob die Batterien voll sind und richtig eingelegt sind. Falls es immer noch nicht funktioniert, kannst du innerhalb der USA und Kanadas unsere Hotline anrufen (Tel KID-KNEX). Auf der Rückseite dieser Anleitung findest du weitere Möglichkeiten, K NEX. zu kontaktieren. Falls die Wagen bei der Abfahrt stecken bleiben: Ist das Modell richtig zusammengebaut? Überprüfe, ob der Wagen gegen einzelne Bauteile stößt. Sind die Schienenstücke richtig miteinander verbunden? Sitzt der Wagen richtig auf den Schienen? Ändere den Schienenverlauf so, dass die Wagen immer genügend Schwung haben. Tips & Oplossen van problemen Wanneer de motor niet werkt: Kijk na dat je nieuwe batterijen hebt en dat ze er behoorlijk zijn aangebracht. Werkt het nog steeds niet, bel dan de Klantendienst Hotline op aan het nummer KID-KNEX (uitsluitend in de VS en Canada). Kijk naar het achterblad voor andere manieren om contact op te nemen met K NEX. Wanneer wagens vastlopen tijdens de daling: Is het model behoorlijk opgebouwd? Verzeker je ervan dat de wagen tegen geen K NEX onderdelen aanloopt. Zijn de spoorstukken behoorlijk verbonden? Is de wagen behoorlijk aan het spoor verbonden? Ajusteer het spoor om platte stukken op het spoor te verwijderen.
39 (ES) Español (Página 2) Guarde esta información importante para futuras referencias Información importante para los Padres y Niños ADVERTENCIA: PELIGRO DE ASFIXIA Piezas pequeñas. No para niños menores de 3 años. PRECAUCIÓN: Mantén el cabello, los dedos, la cara y la ropa alejada de las piezas móviles. PRECAUCIÓN: Si el cabello del niño entra en contacto con las partes en movimiento del juguete, puede quedar enredado. No intentes lanzar nada que no sea el carrito. No obstruyas la pista con objetos o cualquier parte de tu cuerpo. Compartan la experiencia K NEX con su niño y hagan que la construcción con K NEX sea una divertida aventura de toda la familia. Dedica tiempo a disfrutar el proceso de construcción. No te apresures! Mientras construyes, trata de colocar tu modelo en la misma dirección que se muestra en las instrucciones. El producto y los colores pueden variar. Información de la batería Cómo insertar y quitar las pilas Utilizar un pequeño destornillador principal Phillips para aflojar el tornillo y para quitar la cubierta de batería. Insertar 3 C (LR14) baterías** frescas en el compartimiento de batería con la polaridad correcta (+/-). ** No se incluyen Instale las baterías antes de la construcción de modelo. PRECAUCIÓN: Para evitar fugas en las pilas Inserte las pilas de acuerdo con los esquemas de polaridad (+/-). No mezcle diferentes tipos de pilas. No mezcle pilas alcalinas, estándar (carbón-zinc) o recargables (níquel-cadmio). No mezcle pilas viejas con nuevas. Se debe usar solamente pilas del mismo tipo, o las que se recomienden como equivalentes. Siempre retire las pilas débiles o gastadas del producto; no forme cortocircuito en los puntos de intercambio. Retire todas las pilas si el juguete no se usará por mucho tiempo. Consejos importantes Se recomiendan las pilas alcalinas. No se recomiendan las pilas recargables. Retire las pilas recargables del juguete antes de cargarlas; éstas deben ser cargadas solamente bajo la supervisión de un adulto. No se debe recargar las pilas que no son recargables. Mantenga los componentes sin polvo; no sumerja ni use en agua. No deseche las pilas en el fuego ya que pueden tener fugas, explotar y causar lesiones personales. Proteger el medio ambiente no disponiendo de este producto en la basura del hogar (2012/19/EU). Consultar con la agencia local para el consejo y las instalaciones de reciclaje (solo Europa). Para actualizar las instrucciones visita KNEX.com (Página 6) Básicos de Construcción Empieza a construir Para comenzar tu modelo, busca el 1 y sigue los números. Cada pieza tiene su propia forma y color. Simplemente mira los dibujos, busca las piezas correspondientes en tu juego y después conéctalas. Mientras construyes, trata de colocar tu modelo en la misma dirección que se muestra en las instrucciones. Los colores desteñidos muestran que esta sección ya está construida. Conecta las nuevas secciones en los lugares señalados por las flechas. Las nuevas piezas que agregues estarán en colores vivos. Conectores Hay conectores azules y plateados con ranuras largas especiales. Se enganchan deslizándose como ves en los dibujos. Conecta estas piezas empujándolas hasta que oigas clic. Espaciadores Hay lugares en tu modelo donde tendrás que agregar espaciadores azules y plateados. Cerciórate de usar el color correcto y cuéntalos con cuidado. Motor El carrito se moverá en la dirección que indica la flecha en el motor. Esperar siempre algunos segundos después de dar vuelta el motor encendido antes suavemente de empujar el coche hacia el motor. (Página 7) Lista de Piezas Antes de empezar con la construcción, asegúrate de comparar las piezas en tu conjunto con la lista de las piezas aquí. Si faltan algunas, llámanos o escríbenos siguiendo las instrucciones en la página trasera. Estamos aquí para ayudarte. (Página 17) Instalaste tres pilas C (o LR14) en el motor? (Página 22) Empuja los conectores hacia adentro hasta que oigas un clic. (Página 23) Al construir, conecta siempre la pista de lado superior a lado superior. Siempre unirse a este extremo de la pista a la pieza primera pista anterior, a continuación, conecte el resto de la pista a la torre. (Página 38) Para sujetar los coche, desarma una pieza de la pista y entonces ensarta las ruedas del coche sobre el lado superior de la pista. Luego, junta las piezas de la pista. Si los coches quedan atascados mientras van hacia abajo, asegúrate de que el coche no esté golpeando ninguna de las piezas K NEX. El carrito debe moverse en la dirección que se muestra. Consejos y solución Si el motor no funcionan: Comprueba si tienes pilas nuevas y si están instaladas correctamente. Si aún así no trabaja, llama a nuestra Línea de Servicio al Cliente al KID-KNEX (EE.UU. y Canadá solamente). Mira en la cubierta de atrás para otras formas de comunicarte con K NEX. Si los coches quedan atascados mientras van hacia abajo: El modelo está construido correctamente? Asegúrate de que el coche no esté golpeando ninguna de las piezas K NEX. Las piezas de la Pista están conectadas correctamente? El coche está sujetado a la Pista correctamente? Ajusta la Pista para eliminar cualquier lugar plano que le encuentres. (IT) Italiano (Pagina 2) Conservare queste importanti informazioni per riferimento futuro Informazioni importanti per bambini e genitori AVVISO: PERICOLO DI SOFFOCARE Pezzi piccoli. Non adatto per bambini sotto 3 anni. ATTENZIONE: Tenere i capelli, le dita, il viso e i vestiti lontano da tutte le parti in movimento. ATTENZIONE: I capelli del bambino potrebbero impigliarsi se vengono a contatto con le parti del giocattolo in movimento. Non tentare di lanciare qualche cosa tranne l automobile del sottobicchiere. Non ostruire la pista con gli oggetti o qualsiasi parte del vostro corpo. Condividi l esperienza di K NEX con tuo figlio e rendi la costruzione con K NEX un divertimento per tutta la famiglia. Prendi il tempo necessario per divertirti durante il processo di costruzione. Non ti affrettare! Orienta il tuo modello nella stessa direzione indicata nelle istruzioni. Il prodotto e i colori possono variare. Informazioni sulle batterie Come inserire e rimuovere le batterie Utilizzare un piccolo cacciavite phillips per allentare la vite e per rimuovere la copertura di batteria. Inserire 3 C (o LR14) batterie** fresche nello scompartimento di batteria con la polarità corretta (+/-). ** Non incluse Installare le batterie prima di modelli di edifici. ATTENZIONE: Come evitare perdite delie batterie Inserire le batterie con la polarità corretta (+/-) come illustrato. Non mischiare tipi diversi di batterie. Non mischiare alcaline, standard (carbonio-zinco) e ricaricabili (nichel-cadmio). Non mischiare insieme batterie nuove e vecchie. Usare sempre batterie raccomandate dello stesso tipo o di tipo equivalente. Rimuovere sempre batterie quasi scariche o completamente scariche dal prodotto; non causare corto circuito ai terminali di alimentazione. Non gettare le batterie nel fuoco, poiché potrebbero perdere o esplodere e causare lesioni. Consigli importanti Si raccomanda l uso di batterie alcaline. Non si raccomanda l uso di batterie ricaricabili. Rimuovere le batterie ricaricabili dal giocattolo prima della carica: devono essere caricate solo sotto la supervisione di un adulto. Le batterie non ricaricabili non devono essere ricaricate. Mantenere i componenti privi di polvere; non immergere o usare in acqua. Rimuovere tutte le batterie se il giocattolo non verrà usato per un lungo periodo di tempo. Proteggere l ambiente: non smaltire questo prodotto con i rifiuti domestici (2012/19/EU). Controlla la tua autorità locali per consigli e impianti di riciclaggio (solo in Europa). Gli Aggiornamenti alle Istruzioni si trovano online all indirizzo KNEX.com (Pagina 6) Istruzioni di base per costruire con K NEX Comincia a costruire Per iniziare il modello, cerca il numero 1 e segui i numeri. Ogni pezzo ha una sua forma e un suo colore. Guarda la figura, trova i pezzi corrispondenti nel set e mettili insieme. Cerca di tenere il modello nella stessa direzione della figura e in tal modo sarà più semplice attaccare i pezzi nei posti giusti. I colori spenti ti dicono che questa sezione è già stata costruita. Dovrai collegare la nuova sezione al punto indicato dalla punta della freccia. Connettori È molto importante posizionare i connettori blu e argento in una specifica direzione. Presta molta attenzione alle istruzioni e posiziona i connettori orizzontalmente o verticalmente proprio come illustrato. Spingi con forza fino ad udire un clic. Spaziatori Ci sono punti nel tuo modello a cui dovrai aggiungere spaziatori blu e argento. Accertati si contarli attentamente. Motore La macchina andrà nel senso della freccia al cima del motore. Devi sempre aspettare alcuni secondi dopo che accendi il motore, prima di delicatamente dare una spinta alla macchina verso il motore. (Pagina 7) Elenco delle parti Prima di cominciare a costruire, accertati di confrontare le parti che sono nel tuo set con l elenco delle parti qui. Se ne manca una chiamaci o scrivici usando le informazioni che sono nella retrocopertina. Noi siamo qui per aiutarti! (Página 17) Hai installato 3 batterie C (o LR14) nel motore? (Página 22) Premi i connettori saldamente fino a che si fissano con uno scatto. (Pagina 23) Collega sempre la rotaia parte superiore a parte superiore in tutta la costruzione. Sempre partecipare a questo fine della traccia per traccia del pezzo precedente, poi collegare il resto della pista alla torre. (Pagina 38) Per collegare le carrozza, stacca un pezzo di rotaia e quindi infila le ruote della carrozza sulla parte superiore della rotaia. Quindi unisci i pezzi della rotaia. Se le carrozze si arrestano durante la discesa, Controlla che la carrozza non abbia colpito qualche altra parte K NEX. La macchina deve viaggiare nel senso indicato. Suggerimenti e risoluzione dei problemi Se il motore non funzionano: Controlla che le batterie siano nuove e che siano installate correttamente. Se ancora non dovesse funzionare, chiama il numero di assistenza ai clienti KID-KNEX (USA e Canada soltanto). Vedi il retro della scatola per trovare altri modi di contattare K NEX. Se le carrozze si arrestano durante la discesa: Il modello è costruito correttamente? Controlla che la carrozza non abbia colpito qualche altra parte K NEX. I pezzi della rotaia sono collegati correttamente? La carrozza è collegata alla rotaia correttamente? Regola la rotaia per eliminare qualsiasi parte piatta sulla stessa. (PT) Português (Página 2) Manter esta informação importante para referência futura Coisas importantes para os Pais e os Miúdos AVISO: PERIGO DE SUFOCAÇÃO Peças pequenas. Não se destina a crianças com menos de 3 anos de idade. CUIDADO: Mantém o cabelo, os dedos, a cara e a roupa afastados de todas as peças móveis. CUIDADO: O cabelo da criança pode ficar emaranhado se entrar em contacto com as peças móveis do brinquedo. Não tentar lanç qualquer coisa à excepção do carro do coaster. Não obstruir a trilha com objetos ou qualquer parte de seu corpo. Compartilhe da experiência K NEX com os miúdos e faça com que o processo de construção com K NEX se torne numa aventura entre família. Não te precipites para assim poderes desfrutar do processo de construção. Não o faças à pressa! Tenta fazer com que o teu modelo esteja virado exactamente na mesma direcção indicada nas instruções. Tanto o produto como as respectivas cores podem variar. Informações sobre as pilhas Como introduzir e remover baterias Usar uma chave de fenda principal pequena de Phillips para afrouxar o parafuso e para remover a tampa de bateria. Introduzir 3 C (ou LR14) baterias** frescas no compartimento de bateria com a polaridade correta (+/-). ** Não estão incluídas Instale baterias antes modelos de construção. CUIDADO: Para evitar fugas das pilhas Introduza as pilhas com a polaridade correcta (+/-), conforme se mostra. Não misture tipos diferentes de pilhas. Não misture pilhas alcalinas, padrão (carbono-zinco) ou pilhas recarregáveis (níquelcádmio). Não combine pilhas usadas com pilhas novas. Apenas pilhas do mesmo tipo ou equivalentes ao tipo recomendado. Retire sempre as pilhas fracas ou gastas do produto; não provoque um curto-circuito nos terminais de alimentação. Retire todas as pilhas do brinquedo se não tencionar usá-lo durante um longo período de tempo. Conselhos importantes Recomenda se o uso de pilhas alcalinas. Não se recomenda o uso de pilhas recarregáveis. Retire as pilhas recarregáveis do brinquedo antes de as carregar; estas pilhas devem ser recarregadas apenas sob vigilância de adultos. As pilhas não recarregáveis não devem ser carregadas. Mantenha os componentes livres de poeiras; não mergulhe em água nem use água. Não elimine as pilhas queimando-as; estas podem apresentar fugas ou explodir causando lesões. Proteger o meio ambiente por não dispor deste produto com o lixo doméstico (2012/19/EU). Verifique as autoridades locais para obter informações sobre reciclagem e instalações (apenas na Europa). Entre em KNEX.com para ver actualizações e instruções (Página 6) Pontos básicos para a construção K NEX Inicia a construção Para começar o teu modelo, procura o 1 e segue os números. Cada peça tem a sua própria forma definida e cor. Basta simplesmente olhares para a ilustração, procurar as peças do teu jogo correspondentes às que estás a ver e, em seguida, conectar umas nas outras. Enquanto estás a montar as peças, tenta manter o teu modelo na mesma direcção, conforme mostrado na ilustração, para assim ligares as peças correctamente. As cores desbotadas indicam que esta secção já está montada. Passarás então a fazer a conexão da nova secção no local indicado pelas setas. Conectores É muito importante que posiciones os conectores azuis e cor de prateados numa direcção específica. Presta muita atenção às instruções e coloca estes conectores horizontal ou verticalmente, exactamente conforme se mostra nas ilustrações. Junta as partes simultaneamente e com firmeza até ouvires um estalido. Espaçadores Existirão certos pontos no teu modelo que necessitam a colocação de espaçadores azuis e prateados. Assegura-te que os contas cuidadosamente. Motor O carro irá no sentido da seta sobre o motor. Esperar sempre alguns segundos após ter girado o motor sobre antes delicadamente de empurrar o carro para o motor. (Página 7) Lista de peças Antes de iniciares a construção, certifica-te de que comparas as peças do teu conjunto com a lista das peças aqui. Se faltar alguma peça telefona ou escreve-nos usando as informações indicadas na contracapa. Estamos aqui para te ajudar! (Página 17) Foram instaladas as pilhas 3 C (ou LR14) no motor? (Página 22) Faz avançar os conectores firmemente até encaixarem com um estalido. (Página 23) Liga sempre a face superior da Pista à face superior durante a montagem. Sempre aderir a este final da trilha para a peça faixa anterior primeiro, e depois conectar o restante da trilha para a torre. (Página 38) Para prenderes as carruagem, desliga uma peça da pista e, seguidamente, enfia as rodas da carruagem sobre a face superior da pista. Depois junta as peças da pista umas às outras. Se as carruagem ficarem encravadas na descida, assegura-te de que a carruagem não está a chocar contra outras peças K NEX. O carro deve viajar no sentido mostrado. Sugestões e Resolução de Problemas Se o Motor não funcionar: Verifica se as pilhas são novas e se estão instaladas correctamente. Caso continuem sem funcionar, contacta a Linha Directa de Atendimento ao Consumidor através do número KID-KNEX (apenas nos EUA e no Canadá). Consulta a contra capa para mais informações sobre como contactares a K NEX. Se as Carruagens ficarem encravadas na descida: O modelo foi construído correctamente? Assegura-te de que a carruagem não está a chocar contra outras peças K NEX. As peças da pista estão ligadas correctamente? A carruagem está presa à Pista correctamente? Ajusta a pista para eliminares qualquer ponto plano na pista. 39
40
YELLOW SUBMARINE BUILDING SET SOUS-MARIN JAUNE MC JEU DE CONSTRUCTION AMERICA'S BUILDING TOY JOUET DE CONSTRUCTION. Building Worlds Kids Love
 YELLOW SUBMARINE BUILDING SET SOUS-MARIN JAUNE MC JEU DE CONSTRUCTION AMERICA'S BUILDING TOY JOUET DE CONSTRUCTION d'amerique TM MC 86 Building Worlds Kids Love Building Basics Start Building To begin
series série8 BOWSER COLLECT ALL 7! COLLECTIONNEZ LES 7! * 1 Figure/Figura Building Worlds Kids Love
 series série8 38057 BOWSER COLLECT ALL 7! COLLECTIONNEZ LES 7! * 1 Figure/Figura Building Worlds Kids Love TM & 2016 Nintendo. WARNING: CHOKING HAZARD Small parts. Not for children under 3 years. ATTENTION
series série4 BOB-OMB TM COLLECT ALL 7! COLLECTIONNEZ LES 7! * 1 Figure/Figura Building Worlds Kids Love Building Worlds Kids Love
 series série4 38432 BOB-OMB TM COLLECT ALL 7! COLLECTIONNEZ LES 7! * 1 Figure/Figura TM & 2014 Nintendo. 2014 K NEX Limited Partnership Group, P.O. Box 700, Hatfield, PA 19440-0700; email@knex.com; knex.com;
series série GOOMBA COLLECT ALL 7! COLLECTIONNEZ LES 7!* 1 Figure/Figura Building Worlds Kids Love
 5 series 38009 série GOOMBA TM COLLECT ALL 7! COLLECTIONNEZ LES 7!* 1 Figure/Figura Building Worlds Kids Love TM & 2014 Nintendo. 2014 K NEX Limited Partnership Group, P.O. Box 700, Hatfield, PA 19440-0700;
series série MARIO COLLECT ALL 8! COLLECTIONNEZ LES 8!* 1 Figure/Figura
 38074 series série MARIO TM COLLECT ALL 8! COLLECTIONNEZ LES 8!* 1 Figure/Figura 2013 K NEX Limited Partnership Group P.O. Box 700, Hatfield, PA 19440-0700 1-800-KID-KNEX (USA/Canada/États-Unis/EE.UU.);
Spacers There are places in your model where you need to use spacers. Be sure to use the correct number of spacers shown in the instructions.
 (EN) English Install batteries before building models. Keep hands, face, hair and clothing away from all moving parts. Keep this important information for future reference. Battery Information How to Insert
** Not included. CAUTION: To Avoid Battery Leakage
 (EN) English CONTENTS K NEX Building Basics...4 Parts List...5 Rattlesnake Rampage...5 Viper s Venom Roller Coaster...6 Tips and Troubleshooting... 29 Keep this important information for future reference
ROBO-CROC BUILDING SET JEU DE CONSTRUCTION. 2 X Not included MOTOR MOTEUR. Building Worlds Kids Love BUILDS CONSTRUIRE ** Motore
 Building Worlds Kids Love ROBO-CROC BUILDING SET JEU DE CONSTRUCTION BUILDS À 3À CONSTRUIRE ** 7 + 307 X Not included AA (LR6) Pas inclus No se incluyen Nicht enthalten Non incluse Não estão incluídas
X Not included MOTOR MOTEUR * TURBO JET 2-IN-1 BUILDING SET TURBORÉACTEUR 2 EN 1 JEU DE CONSTRUCTION BUILDS CONSTRUIRE **
 Building Worlds Kids Love TURBO JET -IN- BUILDING SET TURBORÉACTEUR EN JEU DE CONSTRUCTION 7 + 7 + 600 X Not included AA (LR6) Pas inclus No se incluyen Nicht enthalten Non incluse Não estão incluídas
BUILDING BASICS. Start Building
 2 Parts List Before you start building, be sure to compare the parts in your set with the parts list here. If anything is missing, call or write to us using the information on the back cover. We are here
# seabattle_instr_v5.indd 1 1/2/12 1:49 PM
 # 80 891 seabattle_instr_v5.indd 1 1/2/12 1:49 PM x250 seabattle_instr_v5.indd 2 1/2/12 1:49 PM seabattle_instr_v5.indd 3 1/2/12 1:49 PM seabattle_instr_v5.indd 4 1/2/12 1:49 PM 1. 2. 3. 4. seabattle_instr_v5.indd
TRI-STEGO BUILDING SET JEU DE CONSTRUCTION
 Building Worlds Kids Love TRI-STEGO BUILDING SET JEU DE CONSTRUCTION BUILDS RUIT CON**ST LES 7 + LR ) A ( A X Not included Non incluses No se incluyen Nicht enthalten Non incluse Não estão incluídas Niet
1 MODEL PER WEEK! 7 + MODEL BUILDING SET MODÉLE JEU DE CONSTRUCTION MODÉLE PAR SEMAINE!
 MODÉLE PAR SEMAINE! MODEL PER WEEK! 5 MODEL BUILDING SET MODÉLE JEU DE CONSTRUCTION 7 + 65 Hummingbird...6 Camel...6 Praying Mantis...7 Centipede...7 Windmill...8 Butterfly...9 AMERICAN MADE PARTS CONTENTS
WARNING: ATTENTION : facebook.com/knex
 Sold separately. Vendus séparément. Se venden por separado. Separat erhältlich. Venduti separatamente. Vendidos separadamente. Afzonderlijk verkocht. 2016 K NEX Limited Partnership Group, P.O. Box 700,
(EN) CONTENTS ALIEN... SNOWFLAKE... TURTLE... TIGER FISH... SANDWICH... OWL... DEER...7 VASE & FLOWERS... PORCUPINE... FIRE TRUCK... SAILING SHIP... B
 CONTENTS ALIEN... SNOWFLAKE... TURTLE... TIGER FISH... SANDWICH... OWL... DEER...7 VASE & FLOWERS... PORCUPINE... FIRE TRUCK... SAILING SHIP... B") TM th Anniversary Ultimate Builder s Case ème Anniversaire Ultime Cas de Constructeur BUILDS MODÈLES* Ages 7-0 WARNING: CHOKING HAZARD Small parts. Not for children under years. ATTENTION : RISQUE D ÉTOUFFEMENT
TM th Anniversary Ultimate Builder s Case ème Anniversaire Ultime Cas de Constructeur BUILDS MODÈLES* Ages 7-0 WARNING: CHOKING HAZARD Small parts. Not for children under years. ATTENTION : RISQUE D ÉTOUFFEMENT
7-12. SUPER VALUE TUB Building Set. MEGA BOX Jeu de construction. WARNING: CHOKING HAZARD Toy contains small parts. Not for children under 3 years.
 TM SUPER VALUE TUB Building Set MEGA BOX Jeu de construction 35 BUILDS MODÈLES Ages 7-12 12575 WARNING: CHOKING HAZARD Toy contains small parts. Not for children under 3 years. ATTENTION : RISQUE D ÉTOUFFEMENT
EUSS SOFTWARE UPDATE CHECKLIST COUNTERFEIT DETECTORS NEW 20 EURO BANKNOTE C32 C18 C07 C19 C20. English
 English NEW 20 EURO BANKNOTE SOFTWARE UPDATE CHECKLIST COUNTERFEIT DETECTORS Device New 20 Euro software version number Is this number displayed on your device during start-up? Yes Safescan 125 C32 No
STOMPZ BUILDING SET JEU DE CONSTRUCTION
 Building Worlds Kids Love STOMPZ BUILDING SET JEU DE CONSTRUCTION BUILDS RUIT CON**ST LES 7 + LR6 ) A ( A X Not included Non incluses No se incluyen Nicht enthalten Non incluse Não estão incluídas Niet
(EN) CONTENTS SAILBOAT... RAIN CLOUD... PORCUPINE... GUITAR... DOLPHIN... UNICORN... WIND TURBINE... 0 PUPPY... BRIDGE... LIZARD... 7 SWING RIDE... 0
 CONTENTS SAILBOAT... RAIN CLOUD... PORCUPINE... GUITAR... DOLPHIN... UNICORN... WIND TURBINE... 0 PUPPY... BRIDGE... LIZARD... 7 SWING RIDE... 0") TM IMAGINATION MAKERS Building Set COFFRET IMAGINATION Jeu de construction 0 BUILDS MODÈLES* Ages -0 WARNING: CHOKING HAZARD Small parts. Not for children under years. ATTENTION : RISQUE D ÉTOUFFEMENT
TM IMAGINATION MAKERS Building Set COFFRET IMAGINATION Jeu de construction 0 BUILDS MODÈLES* Ages -0 WARNING: CHOKING HAZARD Small parts. Not for children under years. ATTENTION : RISQUE D ÉTOUFFEMENT
(EN) CONTENTS TIC-TAC-TOE... TRUCK... TRUMPET... CRAB... SHUTTLE... OWL... GIRAFFE, FENCE & TREE... MONKEY & GYM...0 MOTORCYCLE... DRAGSTER... SWING R
 CONTENTS TIC-TAC-TOE... TRUCK... TRUMPET... CRAB... SHUTTLE... OWL... GIRAFFE, FENCE & TREE... MONKEY & GYM...0 MOTORCYCLE... DRAGSTER... SWING R") TM BUILDER BASICS Building Set ELÉMENTS ESSENTIELS DE CONSTRUCTION Jeu de construction BUILDS MODÈLES* Ages - 00 WARNING: CHOKING HAZARD Small parts. Not for children under years. ATTENTION : RISQUE D
TM BUILDER BASICS Building Set ELÉMENTS ESSENTIELS DE CONSTRUCTION Jeu de construction BUILDS MODÈLES* Ages - 00 WARNING: CHOKING HAZARD Small parts. Not for children under years. ATTENTION : RISQUE D
# Octo Adv. Instr_V4.indd 1 5/15/14 9:23 AM
 # 80 960 Octo Adv. Instr_V4.indd 1 5/15/14 9:23 AM Octo Adv. Instr_V4.indd 2 5/15/14 9:23 AM Octo Adv. Instr_V4.indd 3 5/15/14 9:23 AM x2 x200 Octo Adv. Instr_V4.indd 4 x4 5/15/14 9:23 AM ± 2 cm Octo Adv.
Sold separately. Vendus séparément. Se venden por separado. Separat erhältlich. Venduti separatamente. Vendidos separadamente. Afzonderlijk verkocht.
 Sold separately. Vendus séparément. Se venden por separado. Separat erhältlich. Venduti separatamente. Vendidos separadamente. Afzonderlijk verkocht. 2016 K NEX Limited Partnership Group, P.O. Box 700,
1 # 80 981 DE SW Tat pod_v14.indd 1 9/17/13 11:41 AM
 1 # 80 981 DE SW Tat pod_v14.indd 1 9/17/13 11:41 AM X2 X1 5 x30 x30 x30 5 2 DE SW Tat pod_v14.indd 2 9/17/13 11:41 AM x2 x2 3 DE SW Tat pod_v14.indd 3 9/17/13 11:41 AM x4 4 DE SW Tat pod_v14.indd 4 9/17/13
START INICIAR - DÉMARRAGE - INIZIO - INICIAR - INICIO
 START INICIAR - DÉMARRAGE - INIZIO - INICIAR - INICIO ENG: Microsoft wireless mouse PTB: Mouse sem fio da Microsoft FRA: Souris sans fil Microsoft ITA: Mouse senza fili Microsoft PTG: Rato sem fios Microsoft
Building Basics Start Building
 Building Basics Start Building To begin your model, find the own shape and color. Just look at the pictures, find the pieces in your set that match and then connect them together. Try to face your model
BUILDING BASICS. Start Building
 2 Parts List Before you start building, be sure to compare the parts in your set with the parts list here. If anything is missing, call or write to us using the information on the back cover. We are here
FOR PARENTS & KIDS. WARNING: CHOKING HAZARD - Small parts. Not for children under 3 years.
 IMPORTANT STUFF FOR PARENTS & KIDS Keep these instructions in a handy location. They contain important safety information. Read all warnings and instructions before you start to build and operate the model.
8 + Building Worlds Kids Love MILITIA OGRE TITAN BUILDING SET JEU DE CONSTRUCTION
 8 + Building Worlds Kids Love 69504 MILITIA OGRE TITAN BUILDING SET JEU DE CONSTRUCTION (EN) Keep this important information for future reference. (FR) Garde précieusement cette notice pour vous y référer
elements enviro Owner s Manual Manuel du propriétaire Manual del usuario ecofriendly solutions organizing
 enviro elements TM ecofriendly solutions organizing Made with 50% recycled resin Fait de 50 % de résine recyclée Hecho en un 50% con resina reciclada Owner s Manual Manuel du propriétaire Manual del usuario
Building Basics Start Building
 Building Basics Start Building To begin your model, find the own shape and color. Just look at the pictures, find the pieces in your set that match and then connect them together. Try to face your model
WARNING: CHOKING HAZARD - Small Parts. Not for children under 3 years.
 13501/ 23505! WARNING: CHOKING HAZARD - Small Parts. Not for children under 3 years.! AVERTISSEMENT: DANGER D ÉTOUFFEMENT - Pièces de petite taille. Ne pas donner aux enfants de moins de 3 ans.! ATENCIÓN:
AM AS AM15259F AM01128-
 6x AM01314F AM02050-4x AM08841- AM09593F AM02049- AM15299-1 5x AM07629- AM01480- AM09292F AM09931- AM03859- AM09266W AS020684 AM07590- AM10273- M1153N AS020276 AM09393-3x AM09013- AM03523- AS020683 AM09023-
FR: Verse doucement des perles multicolores dans le dôme
 1 1 Verse doucement des perles multicolores dans le dôme carré. Carefully tip the multicoloured beads into the square dome. Schütte deine vielfarbigen Perlen vorsichtig in die quadratische Kuppel. Doe
BUILDING BASICS BASES DE LA CONSTRUCTION
 MECHA BITE Roller Coaster Building Set MORDRE DE MECHA Montagnes Russes Jeu de construction. ft 66 cm Ages 7-3446 (EN) English Keep this important information for future reference WARNING: CHOKING HAZARD
TM Fire Mountain 9882 WARNING: Choking hazard Small parts. Not for children under 3 years. AVERTISSEMENT: Risque de suffocation. Ne convient pas à un
 9882 TM Fire Mountain 9882 WARNING: Choking hazard Small parts. Not for children under 3 years. AVERTISSEMENT: Risque de suffocation. Ne convient pas à un enfant de moins de 3 ans - contient de petits
User Manual Manual del usuario POP-UP LED LANTERNS. Faroles LED retráctiles. Español..7
 User Manual Manual del usuario POP-UP LED LANTERNS Faroles LED retráctiles English 3 Español..7 Contents Parts list... 3 Contents... 3 User instructions... 4 Cleaning and maintenance... 5 Technical specifications...
English - EN Español (América Latina) - XX Português (Brasil) - XC Français (Canadá) - XD
 - XX Português (Brasil) - XC Français (Canadá) - XD") English - EN Español (América Latina) - XX Português (Brasil) - XC Français (Canadá) - XD Push upward to open battery door Insert batteries as shown Pair your mouse with your Windows device: A. On the
English - EN Español (América Latina) - XX Português (Brasil) - XC Français (Canadá) - XD Push upward to open battery door Insert batteries as shown Pair your mouse with your Windows device: A. On the
CAUTION! IMPORTANT SAFETY INSTRUCTIONS CAUTION CAUTION! WARNING ENGLISH ENGLISH. Strangulation hazard. Hang out of reach of young children.
 FINFIN ENGLISH IMPORTANT SAFETY INSTRUCTIONS For indoor use only. Regularly check the cord, the transformer and all other parts for damage. If any part is damaged the product should not be used. Important
KidKraft is here to help! En KidKraft estamos para ayudarle! KidKraft est là pour vous aider! KidKraft hilft Ihnen gerne! KidKraft helpt u graag!
 KidKraft is here to help! If you have any issues with your item or need any assistance, please contact us. Email us with the item number, description of the problem, part number and batch code. (Your batch
CAUTION: ATTENZIONE: ATTENZIONE: CUIDADO: ATTENTION : Important Tips: ATTENTION : DE VORSICHT: Sugestões Importantes: CAUTION: CAUTION: PRECAUCIÓN:
 EN CAUTION: To Avoid Battery Leakage - Be sure to insert the batteries correctly and always follow the toy and battery manufacturers instructions. Do not mix old and new batteries or alkaline, standard
OWNER'S MANUAL MANUEL D'UTILISATEUR MANUAL DEL PROPIETARIO
 Read all instructions BEFORE assembly and USE of product. KEEP INSTRUCTIONS FOR FUTURE USE. Lire les instructions d assemblage soigneusement. GARDEZ CES INSTRUCTIONS POUR USAGE FUTUR. Lea todas las instrucciones
VARIADO Aufbauanleitung notice de montage Building Instructions montagehandleiding Instrucciones de construcción Istruzioni per il montaggio
 VARIADO 09.05.2012 Aufbauanleitung notice de montage Building Instructions montagehandleiding Instrucciones de construcción Istruzioni per il montaggio Vergleichen Sie zuerst die Materialliste mit Ihrem
# DE Super Dealer_Instr_V2.indd 1
 # 80 841 DE Super Dealer_Instr_V2.indd 1 18-07-11 10:12 x1 x1 DE Super Dealer_Instr_V2.indd 2 x50 18-07-11 10:12 ± 2 cm DE Super Dealer_Instr_V2.indd 3 18-07-11 10:12 DE Super Dealer_Instr_V2.indd 4 18-07-11
K NEX CONTENTS. Start Building CONTENIDO
 CONTENTS Clock Tower/Rocket/Milk Shake.... Wheelchair...................... Buggy.......................... 5 Race Car........................ 6 Boat Ride....................... 8 Crane.........................
PARTS LIST / LISTA DE PIEZAS / LISTE DE PIÈCES / ONDERDELENLIJST. 2x M1314JN. 4x M09593N
 RADICAL RAMP PARTS LIST / LISTA DE PIEZAS / LISTE DE PIÈCES / ONDERDELENLIJST 3x M1113A 9x M10273N M1141N 3x M1320JM 4x AM02168F M0910A 3x M1087N 3x M09393JN M1404F AM02170F M1312F M1313N M1314JN 3x M02250QY
GARDEZ CES INSTRUCTIONS POUR USAGE FUTUR.
 Read all instructions BEFORE assembly and USE of product. KEEP INSTRUCTIONS FOR FUTURE USE. Lire les instructions AVANT d'assembler et d'utiliser le produit. GARDEZ CES INSTRUCTIONS POUR USAGE FUTUR. Lea
KIT VW T4 VW T4 Lift Roof
 fiamma.com K VW T4 VW T4 Lift Roof für die Halterungen for brackets pattes Instrucciones de instalacion de los estribos staffe Fiamma F45 Fiamma F45 fiamma.com für die Halterungen for brackets pattes Instrucciones
1 x 15 cm. 90 mm. 75 mm. 3 x. 4 x x. 1 x. 2 x. 1 x 40 cm. 2 x. 2 x x. 1 x. 3 x. 4 x x x
 Sortiervorschlag Box 1 für Aufbewahrungssystem Art.-Nr. 94828 Storage suggestion box 1 for storage system Art No. 94828 Suggestion de classement Boîte 1 pour le système de stockage Art n 94828 Sorteervoorstel
4 DRAWER ORGANIZER ORGANIZADOR DE 4 CAJONES
 MODEL: 11210913 / MODELO: 11210913 DRAWER ORGANIZER ORGANIZADOR DE CAJONES NO N o 1 2 3 NO N o A B C D E PARTS LIST AND HARDWARE LISTA DE ACCESORIOS Y PARTES HARDWARE LIST / LISTA DE ACCESORIOS SCREW /
1
 PARTS AND ACCESSORIES COLOR OF PIECES MAY VARY PARTES Y ACCESORIOS EL COLOR DE LAS PIEZAS PUEDE VARIAR 5 x 7 x IMPORTANT PRE-BUILD STEPS PREVIA IMPORTANTE PASOS DE COMPILACIÓN STEP PASO SEPARATE AND COUNT
English - EN Français - FR Deutsch - DE Italiano - IT Português - PT Español - ES
 English - EN Français - FR Deutsch - DE Italiano - IT Português - PT Español - ES Push upward to open battery door, insert batteries as shown. Pair your mouse with your Windows device: A. On the underside
1 # R2D2-Manual_v6.indd 1 9/17/13 11:37 AM
 1 # 80 979 R2D2-Manual_v6.indd 1 9/17/13 11:37 AM x1 x1 x1 x20 x20 x10 2 R2D2-Manual_v6.indd 2 9/17/13 11:37 AM ± 2 cm 3 R2D2-Manual_v6.indd 3 9/17/13 11:37 AM 1 2 4 R2D2-Manual_v6.indd 4 9/17/13 11:37
4 x. 1 x. 18 x. 8 x. 2 x. 11 x. 2 x x. 4 x. 6 x. 2 x. 9 x. 11 x 4 x x 4 x. 4 x. 8 x. 2 x. 2 x. 1 x. 6 x. 6 x.
 Sortiervorschlag Box 1 für Aufbewahrungssystem Art.-Nr. 94828 Storage suggestion box 1 for storage system Art No. 94828 Suggestion de classement Boîte 1 pour le système de stockage Art n 94828 Sorteervoorstel
WARNING. Coil and Control Module Tester Testing Instructions. page 1. Technical Service Service Techique Servicio Tecnico
 page 1 Identify Coil using Vehicle Year, Make, and Model from Parts Lookup Identifiez bobine utilisant le véhicule Année, marque et modèle de téléphone pièces Identificar Coil usando Año del vehículo,
SERENGETI SAFARI SAFARI
 SERENGETI SAFARI SAFARI 16207 GB F E D NL I P R Please print at scale 1 without the printer margins. Merci d'imprimer à l'échelle 1 sans les marges de l'imprimante. Imprimir a escala 1 sin márgenes de
English - EN Español (Latinoamérica) - XX Português (Brasil) - XC Français (Canada) - XD.
 - XX Português (Brasil) - XC Français (Canada) - XD.") English - EN Español (Latinoamérica) - XX Português (Brasil) - XC Français (Canada) - XD www.microsoft.com/hardware 1 Insert the two AAA alkaline batteries and turn on the mouse. To connect the mouse to
English - EN Español (Latinoamérica) - XX Português (Brasil) - XC Français (Canada) - XD www.microsoft.com/hardware 1 Insert the two AAA alkaline batteries and turn on the mouse. To connect the mouse to
Quickstart Guide. WiPry 5x. 1) Connect antenna to the appropriate port. TM
 Connect antenna to the appropriate port. TM") Quickstart Guide ACCESSORY ANTENNA W A R N I N G DO NOT APPLY MORE THAN 20DBM TO THE ANTENNA WITHOUT EXTERNAL ATTENUATION CONNECT TO HOST DEVICE 1) Connect antenna to the appropriate port. TM 2) Download
Quickstart Guide ACCESSORY ANTENNA W A R N I N G DO NOT APPLY MORE THAN 20DBM TO THE ANTENNA WITHOUT EXTERNAL ATTENUATION CONNECT TO HOST DEVICE 1) Connect antenna to the appropriate port. TM 2) Download
RocketBox AVISO IMPORTANTE ROCKETBOX PRO (1X) KEY (2X) CLÉ (X 2) LLAVES (2X) Part # Rev.C C-1/13
 KEY (2X) CLÉ (X 2) LLAVES (2X) Part # Rev.C C-1/13") RocketBox ROCKETBOX PRO 11, ROCKETBOX PRO 12, ROCKETBOX PRO 14 ROCKETBOX PRO (1X) KEY (2X) CLÉ (X 2) LLAVES (2X) IMPORTANT WARNING IT IS CRITICAL THAT ALL YAKIMA RACKS AND ACCESSORIES BE PROPERLY AND SECURELY
RocketBox ROCKETBOX PRO 11, ROCKETBOX PRO 12, ROCKETBOX PRO 14 ROCKETBOX PRO (1X) KEY (2X) CLÉ (X 2) LLAVES (2X) IMPORTANT WARNING IT IS CRITICAL THAT ALL YAKIMA RACKS AND ACCESSORIES BE PROPERLY AND SECURELY
SIMATIC. SIMATIC S7 Easy Motion Control V12. Welcome Tour. Totally Integrated Automation PORTAL
 SIMATIC S7 Easy Motion Control V12 Welcome Tour Totally Integrated Automation www.siemens.com/tia-portal-welcometour Totally Integrated Automation PORTAL www.siemens.com/easy-motion-control SIMATIC Siemens
You and Me Designed by Antoni Pallejà Office USER S MANUAL MANUAL DEL USUARIO
 You and Me Designed by Antoni Pallejà Office USER S MANUAL MANUAL DEL USUARIO PIECES & TOOLS PIECE A: 2 UNITS PIEZA A PIECE B: 2 UNITS PIEZA B NET RED NET BRACKET: 2 UNITS SOPORTE RED TOOLS / HERRAMIENTAS
Installation Guide C. Countertop
 Installation Guide Countertop K-2447, K-14027, K-14028, K-14029, K-14031, K-14032, K-14033 M product numbers are for Mexico (i.e. K-12345M) Los números de productos seguidos de M corresponden a México
One Drawer Nightstand Table de chevet de tiroir Mesilla de noche con 1 cajone
 Assembly Instructions Instructions de montage Instrucciones de armado One Drawer Nightstand Table de chevet de tiroir Mesilla de noche con 1 cajone DATE STAMP Nightstand Hardware / Quincaillerie de la
GW V~ GW V~
 Serie Suoneria elettronica tritonale e ronzatore Electronic bell and buzzer Sonnieries électroniques et ronfleur Timbres electrónicos y zumbador Elektronische Dreitonklingel und Summer GW 30 631 12V~ GW
TCO REFERENCE: PACK BALANCE WS-30 + PULSE O2 CODIC:
 TCO MARQUE: WITHINGS REFERENCE: PACK BALANCE WS-30 + PULSE O2 CODIC: 4077261 Wireless Scale WS-30 Balance connectée WS-30 Online-Waage WS-30 Báscula conectada WS-30 Bilancia wireless WS-30 Quick Installation
MANUAL DE MONTAGEM ASSEMBLY INSTRUCTIONS INSTRUCCIONES DE MONTAJE COD BR: COD US: V : 01
 MANUAL DE MONTAGEM ASSEMBLY INSTRUCTIONS INSTRUCCIONES DE MONTAJE COD BR: 88000 COD US: 82200 V : 0 V : 0 2 V : 0 3 Forre a área de montagem com um cobertor ou tapete. Assim, você evita avarias nas peças
Clapboard. Not included Non Inclus No Incuido
 English This page lists the contents included in the box. Please take time to identify the hardware as well as the individual components of the product. As you unpack and prepare for assembly, place the
CARACTERÍSTICAS AGUJA DE DÍAS MINUTERO AGUJA DE HORAS SEGUNDERO CORONA N 1 2
 VX7PE CARACTERÍSTICAS AGUJA DE DÍAS MINUTERO AGUJA DE HORAS SEGUNDERO CORONA AGUJA DE FECHA Corona N : Posición normal 1 : Primera posición de clic 2 : Segunda posición de clic 3 Cómo ajustar la hora
COMPUTER DESK ESCRITORIO DE COMPUTADORA
 MODEL: 11222327F / MODELO: 11222327F COMPUTER DESK ESCRITORIO DE COMPUTADORA NO A B C D E F G H I J PARTS AND HARDWARE LISTA DE PARTES Y HARDWARE TOP PANEL PANEL SUPERIOR KEYBOARD PANEL PANEL DE TECLADO
Pala Mix & Match Pala Premium / Pala Mondial / Pala Idealis / PalaVeneer
 Formenkarte Mould Chart Carte des Formes Tabella forme Cartas de Formas Carta Molde Vormenkaart Pala Mix & Match Pala Premium / Pala Mondial / Pala Idealis / PalaVeneer Giving a hand to oral health. Premium
english - EN português do Brasil - XC français - FR español - ES
 english - EN português do Brasil - XC français - FR español - ES www.microsoft.com/hardware 1 1 Insert two AAA alkaline batteries. Slide the power switch to the on position. To connect the keyboard to
INSTRUCCIONES DE ENSAMBLAJE.
 English MULTI-FUNCTIONAL COMPUTER TABLE ASSEMBLY INSTRUCTION MODEL RTA - 3806 IMPORTANT: Surfaces must be cleaned with a solution of a smooth soap and water, then cleared with a dry towel. Do not use solvents
MODEL: P COFFEE TABLE
 Capacidad máxima del estante: 184 lbs. (83.4 kg) Capacidad máxima del estante: 87 lbs. (39.4 kg) Esta unidad está destinada sólo para su uso con los productos y pesos máximos indicados. Si usted utilize
Television Bench Meuble TV Soporte de televisor
 Limited Warranty Television Bench Meuble TV Soporte de televisor La Garantie Limitée Garantía 12 Read this assembly manual carefully, and verify that you have all the parts listed before you begin. Keep
BAU LAMP LARGE ASSEMBLY INSTRUCTIONS
 BAU LAMP LARGE ASSEMBLY INSTRUCTIONS 1 2 3 4 5 6 7 8 9 10 11 12 13 14 GODE RÅD FØR SAMLING: Åbn først poserne når du skal bruge dem. Start med pose 1. Saml altid posernes indhold i numrenes rækkefølge.
 E Dependiendo de la versión y el año, una parte del paragolpes puede ser necesariamente recortada. La información proporcionada por nosotros para el recorte del paragolpes es sólo una ayuda no vinculante.
OWNER'S MANUAL MANUAL DEL PROPIETARIO
 Read all instructions BEFORE assembly and USE of product. KEEP INSTRUCTIONS FOR FUTURE USE. Lea todas las instrucciones ANTES de armar y USAR el producto. GUARDE LAS INSTRUCCIONES PARA USO FUTURO. www.gracobaby.com
Barre dentate e flange per pulegge dentate Timing bars and Flanges for timing pulleys Zahnstangen und Bordscheiben zur Riemenführung Barreaux dentés
 Barre dentate e flange per pulegge dentate Timing bars and Flanges for timing pulleys Zahnstangen und Bordscheiben zur Riemenführung Barreaux dentés et Flasques pour poulies dentées Barras dentadas y Guías
MODEL: F / MODELO: F END TABLE WITH MEDIA STAND & MAGAZINE HOLDER MESA RINCONERA CON ESTANTE & REVISTERO
 MODEL: 11225479F / MODELO: 11225479F END TABLE WITH MEDIA STAND & MAGAZINE HOLDER MESA RINCONERA CON ESTANTE & REVISTERO NO A B C D E F G H I J K L PARTS LIST AND HARDWARE PARTES Y ACCESORIOS PARTS LIST
Installation Guide. Green momit
 Installation Guide Green momit 2015 www.momit.com momit Deviceses Gateway: Model 1 and 2 Wall option The momit Gateway allows your thermostat to be connected to the Internet. It s included in the Starter
Flashcards Series 2 Las Necesidades de la Vida
 Flashcards Series 2 Las Necesidades de la Vida Flashcards are one of the quickest and easiest ways to test yourself on Spanish vocabulary, no matter where you are! Test yourself on just these flashcards
MANUAL DE INSTRUCCIONES / USER'S GUIDE VD31
 MANUAL DE INSTRUCCIONES / USER'S GUIDE VD31 ESP AJUSTE DE LA POSICIÓN DE LA HORA DUAL - Después de configurar o de cambiar la batería, antes de configurar la hora, verifique si la aguja de hora dual está
QUICK ADJUST WIRE SHELVING
 π QUICK ADJUST WIRE SHELVING 1-800-295-5510 uline.com Para Español, vea páginas 3-4. Pour le français, consulter les pages 5-6. PARTS Standard Shelf x 2 Standard Shelf Support x 8 Quick Adjust Shelf Lock
Instrucciones de uso velas LED
 Außenkerzen: Batterieinstallation: - Entfernen Sie bitte die Abdeckung des Batteriefachs, indem Sie die Schrauben am Fach mit einem Schraubenzieher lösen. - Führen Sie nun die beiden D Batterien (nicht
KidKraft is here to help! En KidKraft estamos para ayudarle! KidKraft est là pour vous aider! KidKraft hilft Ihnen gerne! KidKraft helpt u graag!
 KidKraft is here to help! If you have any issues with your item or need any assistance, please contact us. Email us with the item number, description of the problem, part number and batch code. (Your batch
Quick Installation Guide
 Wireless Scale WS-30 Balance connectée WS-30 Online-Waage WS-30 Báscula conectada WS-30 Bilancia wireless WS-30 Quick Installation Guide FR Guide d installation ES Guía de instalación DE Installationsanleitung
MARQUE: BABYLISS REFERENCE: H700E PEDI SECRET CODIC:
 MARQUE: BABYLISS REFERENCE: H700E PEDI SECRET CODIC: 4304403 NOTICE H700E IB.indd 1 Fig. 1 Fig. 2 Fig. 3 Fig. 4 Fig. 5 Fig. 6 Fabriqué en Chine Made in China BABYLISS 99 avenue Aristide Briand 92120 Montrouge
MINILAND S.A ONIL
 PENTOMINO El juego consta de 12 piezas de forma diferente, pero que tienen exactamente la misma superficie. Esto se comprueba el siguiente gráfico. Observa que cada figura se compone de 5 cuadrantes y
IMPORTANT - READ CAREFULLY - KEEP FOR FUTURE REFERENCE
 SPÖKA ENGLISH IMPORTANT - READ CAREFULLY - KEEP FOR FUTURE REFERENCE WARNING! CAUTION - ELECTRICALLY OPERATED PRODUCT Not recommended for children under 3 years of age. As with all electric products, precautions
π H-2307 CENTER PULL WIPER DISPENSER PARTS LOADING DRY WIPERS uline.com CAN BE MOUNTED INVERTED
 π H-2307 CENTER PULL WIPER DISPENSER uline.com Para Español, vea páginas 3-4. Pour le français, consulter les pages 5-6. CAN BE MOUNTED INVERTED PARTS Dispenser x 1 NOTE: When mounting for use with dry
1. DESCARGA DEL SOFTWARE DE BLUETOOTH EN EL SMARTPHONE
 MANUAL DEL USUARIO PARA BLUETOOTH ES 1. DESCARGA DEL SOFTWARE DE BLUETOOTH EN EL SMARTPHONE Entre en Apple Store o Google Play y busque: - BH Premium BH Premium 2. FIJACIÓN DEL MÓDULO BLUETOOTH Fije el
Getting started with Logitech Wireless Combo MK220. mk220
 Getting started with Logitech Wireless Combo MK220 mk220 Logitech Wireless Combo MK220 K220 Logitech Important Information Safety, Compliance and Warranty M150 2 Contents Logitech Wireless Combo MK220
AT07. Board for Arduino UNO with terminal block placa para Arduino UNO con bornes Plaque pour ARDUINO UNO avec borniers pour CI
 Board for Arduino UNO with terminal block placa para Arduino UNO con bornes Plaque pour ARDUINO UNO avec borniers pour CI AT07 Support board for the Arduino UNO. It makes easier the installation and assembly
Flashcards Series 4 El Hotel
 Flashcards Series 4 El Hotel Flashcards are one of the quickest and easiest ways to test yourself on Spanish vocabulary, no matter where you are! Test yourself on just these flashcards at first. Then,
LAPTOP DESK WITH 3 BINS MESA PARA COMPUTADORA PERSONAL CON 3 CONTENEDORES
 MODEL: 11222775R / MODELO: 11222775R LAPTOP DESK WITH 3 BINS MESA PARA COMPUTADORA PERSONAL CON 3 CONTENEDORES NO A B C D E F G H 1 2 3 4 5 6 7 8 9 PARTS AND HARDWARE LISTA DE PARTES Y HARDWARE TOP PANEL
MODEL: N / MODELO: N GAZEBO / GAZEBO
 MODEL: 5046N / MODELO: 5046N GAZEBO / GAZEBO Precautions:. Check all parts and hardware listed on the part list.. It is recommended to have people for assembly.. Step stool is also recommended during the
Bank Gothic BT medium
 El logotipo - Das Logo - The logo - Le logo - Il Logo El logotipo no debe tener un tamaño inferior a 12 mm. Das Logo darf nie kleiner als 12 mm sein. The logo must never be smaller than 12mm. Le logo ne
This is a foldable that you can use with your k-2 grades. Just choose the parts that you need, choose English or Spanish.
 This is a foldable that you can use with your k-2 grades. Just choose the parts that you need, choose English or Spanish. The first page can be used for two students. It has 16 objects to recycle. The