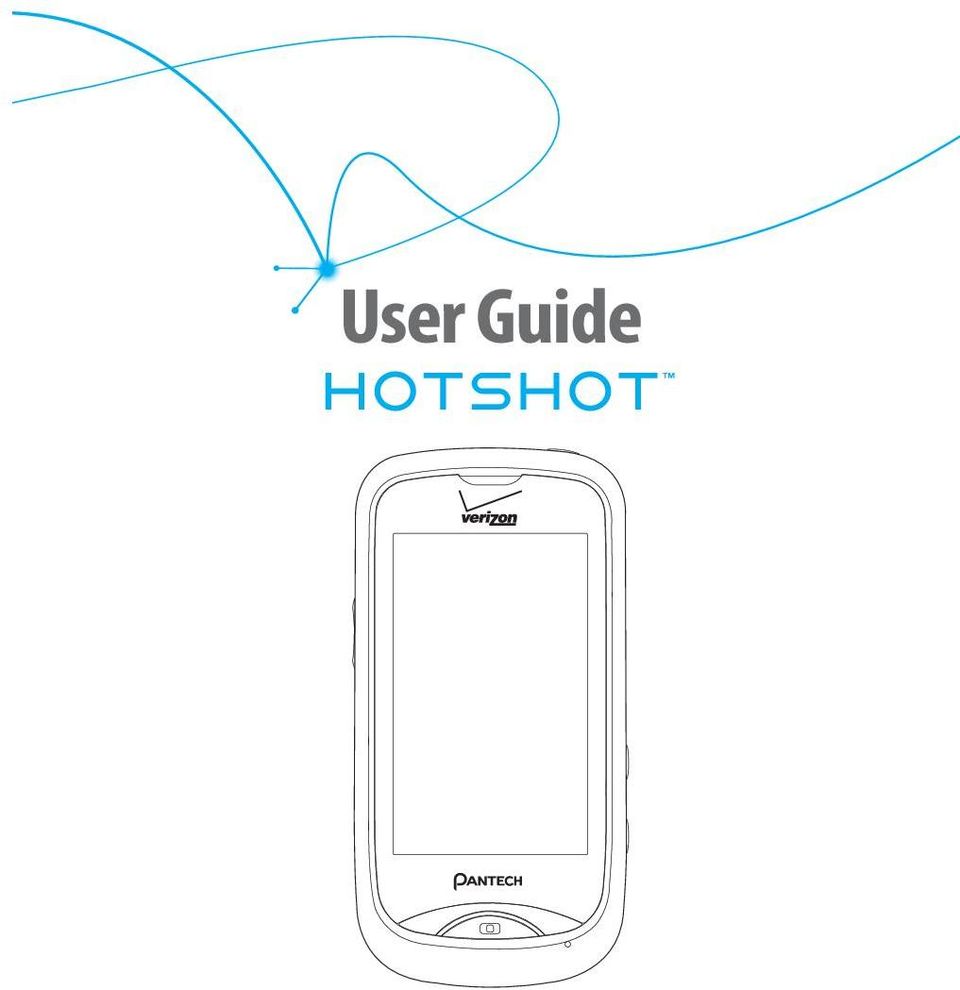
USER GUIDE USUARIO GUÍA DEL USER GUIDE 5U000531C0A REV.00
|
|
|
- Francisco José Mendoza Quiroga
- hace 8 años
- Vistas:
Transcripción
1 USER GUIDE GUÍA DEL USUARIO USER GUIDE 5UC0A REV.00

2 User Guide
3 CHAPTER 1. BEFORE USING BEFORE USING...7 INSIDE THE PACKAGE...8 HANDSET DESCRIPTIONS...9 KEY DESCRIPTIONS DISPLAY INDICATORS INSTALLING THE BATTERY REMOVING THE BATTERY CHARGING THE BATTERY USING A microsd TM CARD BATTERY HANDLING INFORMATION CHAPTER 2. BASIC OPERATION BASIC OPERATION...23 TURNING THE PHONE ON AND OFF USING THE TOUCHSCREEN USING THE HOME SCREEN LOCKING OR UNLOCKING THE TOUCHSCREEN AND KEYS USING THE TASK MANAGER MENU SUMMARY MAKING A CALL ANSWERING A CALL MISSED CALL NOTIFICATION WAIT/PAUSE FEATURE MAKING AN INTERNATIONAL CALL WAY CALLING CALL WAITING FUNCTION CALLING A NUMBER FROM CONTACTS ADJUSTING THE MASTER VOLUME SPEAKERPHONE MODE AVAILABLE OPTIONS DURING A CALL MAKING AN EMERGENCY CALL USING THE DIRECTORY SERVICE CHAPTER 3. MEMORY FUNCTION MEMORY FUNCTION...41 ENTERING TEXT STORING A PHONE NUMBER EDITING CONTACT ENTRIES BACKUP ASSISTANT TM SENDING A NAME CARD SPEED DIALING CHAPTER 4. MENU FUNCTION MENU FUNCTION...47 RECENT CALLS MY VERIZON VOICE COMMANDS CALCULATOR TIP CALCULATOR

4 CALENDAR ALARM CLOCK STOP WATCH WORLD CLOCK UNIT CONVERTER NOTEPAD USB MASS STORAGE AIRPLANE MODE BLUETOOTH SOUND SETTINGS DISPLAY SETTINGS TOUCH SETTINGS PHONE SETTINGS CALL SETTINGS MEMORY USB MODE PHONE INFO CHAPTER 5. CAMERA CAMERA...83 TAKING A PHOTO VIEWING PHOTOS USING PHOTO OPTIONS RECORDING A VIDEO VIEWING VIDEOS USING VIDEO OPTIONS USING CAMERA & CAMCORDER SETTINGS CHAPTER 6. MEDIA CENTER MEDIA CENTER...91 MUSIC & TONES PICTURE & VIDEO GAMES Mobile WEB BROWSE & DOWNLOAD EXTRAS CHAPTER 7. MESSAGING MENU MESSAGING MENU...1 NEW MESSAGE NOTIFICATION... 1 CREATING A NEW MESSAGE... 1 VIEWING RECEIVED AND SENT MESSAGES... 1 DELETING RECEIVED AND SENT MESSAGES... 1 VIEWING DRAFT MESSAGES... 1 DELETING DRAFT MESSAGES... 1 MANAGING THE TEMPLATE BOX... 1 CHANGING THE MESSAGE SETTINGS... 1 ACCESSING YOUR VOIC S & IM

5 CHAPTER 8. SAFETY AND WARRANTY SAFETY AND WARRANTY SAFETY INFORMATION FOR WIRELESS HANDHELD PHONES SAFETY INFORMATION FOR FCC RF EXPOSURE SAR INFORMATION HEARING AID COMPATIBILITY (HAC) FOR WIRELESS TELECOMMUNICATIONS DEVICES FDA CONSUMER UPDATE AVOID POTENTIAL HEARING LOSS FCC COMPLIANCE INFORMATION MONTH LIMITED WARRANTY BEFORE USING This chapter provides important information about using the INSIDE THE PACKAGE HANDSET DESCRIPTIONS KEY DESCRIPTIONS DISPLAY INDICATORS INSTALLING THE BATTERY HOTSHOT TM including: REMOVING THE BATTERY CHARGING THE BATTERY USING A microsd TM CARD BATTERY HANDLING INFORMATION 6

6 INSIDE THE PACKAGE This package should include all items pictured below. If any are missing or different, immediately contact the retailer where you purchased the phone. Standard Battery Pre-installed 2 GB microsd TM Card PRODUCT SAFETY AND WARRANTY INFORMATION HANDSET DESCRIPTIONS Handset Quick Start Guide Product Safety & Warranty Brochure 4 1. Lock/Power Key 2. Earpiece 3. Touchscreen 4. Home Key 5. Wrist Strap Eyelet 6. Headset Jack 7. Volume Keys Battery Cover Wall/USB Charger USB Cable 8 9

7 HANDSET DESCRIPTIONS Self-Portrait Mirror 9. Speaker 10. microsd TM Card Slot 11. Camera Lens Charging/Data Port 13. Voice Commands Key 14. Camera/Video Key KEY DESCRIPTIONS The following list correlates to the previous page s phone illustration. 1. Lock/Power Key: With the phone unlocked, press to lock the phone. Press and hold to turn the phone on or off. 2. Earpiece: Allows you to hear the other caller. 3. Touchscreen: Tap the touchscreen to access the menu or perform phone functions. 4. Home Key: Press to return to the Menu mode screen. In Menu mode, press to view the touchscreen in 3-way view. Press and hold to open the Task Manager screen. 5. Wrist Strap Eyelet: Accessory eyelet (attach optional straps and lanyards purchased separately). 6. Headset Jack: Plug in an optional 3.5mm headset for convenient handsfree conversations or for listening to music. 7. Volume Keys: With the phone unlocked, from Menu mode, press to adjust the phone s volume. When a call comes in, press to silence the call ringtone. During a call, press to adjust the earpiece volume. In Speakerphone mode, press to adjust the speaker volume. During playback, press to adjust the music volume. 8. Self-Portrait Mirror: Displays your reflection when taking photos or recording videos. 9. Speaker: Music, ringtones, and sounds are played through the external speaker. 10. microsd TM Card Slot: A 2GB microsd TM card comes pre-installed to increase memory capacity. 11. Camera Lens: The lens of your built-in camera and camcorder

8 12. Charging/Data Port: Connects to the USB cable for data transferring or charging when attached to the Wall/USB Charger. 13. Voice Commands Key: With the phone unlocked, from Menu mode, press to launch the Voice Commands menu. 14. Camera/Video Key: With the phone unlocked, from the Menu mode screen, press to turn on the camera; Press and hold to turn on the camcorder. In Camera mode, press to take a photo, or in Camcorder mode, press to record a video. DISPLAY INDICATORS Icon Icon Descriptions D Signal Strength: Indicates your phone is in the digital network. More bars indicate a stronger signal. 3G Signal Strength: Indicates your phone is in the EVDO (3G) network. More bars indicate a stronger signal. 1X Signal Strength: Indicates your phone is in the CDMA 1X network. More bars indicate a stronger signal. 3G & 1X Signal Strength: Indicates your phone is in the EVDO (3G) and CDMA 1X networks. More bars indicate a stronger signal. 3G & D Signal Strength: Indicates your phone is in the EVDO (3G) and digital networks. More bars indicate a stronger signal. Airplane Mode: Transmitting and receiving information is restricted. Music Only Mode: Indicates your phone is in Music Only mode. Roaming: Indicates your phone is outside of the home service area. Icon Icon Descriptions Femto Cell: Indicates that this area has enhanced service coverage indoors. SSL (Secured Socket Layer): Indicates that secure communication between client and server has been established during data communication using encryption. Voice Privacy: Indicates Voice Privacy mode is active. Data Call: Indicates a data call is in progress. Dormant: Indicates phone is in a dormant state during a data call. Phone reverts to Dormant mode when there hasn't been activity on a page for some time - the connection is still active and you can make and receive calls. No Service: Indicates no phone service is available. TTY: Indicates TTY mode is active. Voice Call: Indicates a voice call is in progress. E911: Location (GPS) service is set to E911 Only for emergency calls. Location On: Location (GPS) service is set to Full Detection. Phone Lock: Indicates Phone is locked. Bluetooth: Indicates Bluetooth mode. Bluetooth Active: Indicates Bluetooth Active mode. Bluetooth Connected: Indicates a Bluetooth device is paired with your phone

9 Icon Icon Descriptions Music Pause Mode: Indicates that music playback is paused. Music Playing Mode: Indicates that music is playing. AVR Active: Advanced Voice Command feature is active. AVR Listening: Indicates your phone recognizes your voice command. Battery Level: Indicates the battery charging level - the more bars, the stronger the power. All Sounds Off: Indicates phone sounds are set to off. Alarm Only: Indicates the phone will alert you only with an alarm tone. Vibrate On: Indicates Alert Vibrate for incoming calls is set to on. Voic Indicates you have a new voic . Alert Voic Indicates a new voic . Missed Calls: Indicates you have missed calls. Message: Indicates you have new messages. Alert Message: Indicates a new message. Indicates you have new . CMAS Alert: Indicates a new CMAS message. Icon Icon Descriptions Alarm On: Indicates an alarm is set. Speakerphone: Indicates Speakerphone mode is active. Recent Call Icons Dialed Call Missed Call Received Call New Contact Icons Mobile WL Messenger Mobile 2 Ringtone Home Message Tone Business Favorite Fax Group Personal Speed Dial Business Title IM Screen Name Company AIM Birthday Alert Indicates a new . Yahoo! Note Calendar Appointment: Indicates an alarm for your appointment is active

10 Message Icons Unread Message Read Message Unread EMS Read EMS Unread MMS Notification Read MMS Notification Unread Corrupt Message Read Corrupt Message Unread Wap Push Read Wap Push Received Unread Message Received Read Message Multiple Message Sent Message Delivered Multiple Message Delivered Sent Message Delivery Failed Multiple Message Failed Pending Message Send Multiple Message Pending Incomplete Delivery INSTALLING THE BATTERY 1. Slide the battery into the slot (1) by aligning the contacts and push down (2) until you hear the click. Correct Incorrect 2. Align the cover tabs with the slots on the back of the phone and slide the battery cover onto the unit until it snaps into place. If the battery is not correctly placed in the compartment, the phone will not turn on and/or the battery may detach during use. Unread MMS Read MMS Multiple Message Incomplete Text Message Draft Correct Incorrect Unread CMAS Picture Message Draft Read CMAS Priority Sent Message Message Locked 16 17

11 REMOVING THE BATTERY 1. To remove the battery cover, insert your finger tip into the slot (1), then push down on the top of the battery cover and slide it off (2). 2. Insert your fingernail into the slot and lift the battery from the compartment. 3. Align the cover tabs with the slots on the back of the phone and slide the battery cover onto the unit until it snaps into place. CHARGING THE BATTERY 1. Connect the USB data cable into the cableless wall adapter. 2. Plug the USB data cable into the phone s Charging/ Data Port (making sure to align the connector as it appears in the image to the right) and the wall adapter end into an electrical outlet. If the battery connector is not properly aligned, damage could occur to the charging connector and the phone may not be charged. Correct Correct Incorrect Incorrect 3. To remove the wall charger, unplug the USB data cable from the phone s Charging/Data Port. When you charge the battery with the handset powered off, you will see a charging status screen. After charging is completed, the Charge Complete message appears and you cannot operate the phone until it is powered on. To turn your phone on, press and hold the Power Key until your display turns on. The battery may not be fully charged at the time of purchase. Fully charge the battery before using. It is more efficient to charge the battery with the handset powered off. Battery operating time gradually decreases over time. If the battery fails to perform normally, you may need to replace the battery

12 USING A microsd TM CARD A microsd TM card stores sounds, videos, images, photos, music, and other files. A 2GB microsd TM card comes pre-installed in your phone. INSTALLING A microsd TM CARD To install your microsd TM card: 1. Remove the battery cover and the battery. 2. Press the microsd TM card into the slot with the gold contacts facing down. 3. Replace the battery and the battery cover. To prevent possible damages, please keep the microsd TM card slot closed at all times regardless of whether a microsd TM card is inserted or not. REMOVING A microsd TM CARD To remove the microsd TM card: 1. Remove the battery cover and the battery. 2. Gently pull the exposed edge of the microsd TM card with your fingertip to release it from the slot. 3. Remove the microsd TM card. 4. Replace the battery and the battery cover. To ensure the proper function of removable memory, please use a microsd TM card. BATTERY HANDLING INFORMATION DO S Only use the battery and charger approved for use with the Hotshot TM. fire, explosion, leakage, or other hazard. other hazard. temperatures above or below the recommended range, give it time to warm up or cool down before using. DON TS Don t attempt to disassemble or open the battery it is a sealed unit with no serviceable parts. Don t crush, bend or deform, puncture or shred the battery. Don t drop the phone or battery. If the phone or battery is dropped, especially on a hard surface, and the user suspects damage, take it to a service center for inspection. Don t leave the battery in extremely hot or cold temperatures. Otherwise, it could significantly reduce the capacity and lifetime of the battery. Don t modify or remanufacture, attempt to insert foreign objects into the battery, immerse or expose to water Don t accidentally short-circuit the battery by carrying it in your pocket or purse with other metallic objects such as coins, clips and pens. This may critically damage the battery. Don t short-circuit a battery or allow metallic conductive objects to contact battery terminals. Don t dispose of the battery by placing into a fire

13 TURNING THE PHONE ON AND OFF USING THE TOUCHSCREEN USING THE HOME SCREEN LOCKING OR UNLOCKING THE TOUCHSCREEN AND KEYS USING THE TASK MANAGER MENU SUMMARY MAKING A CALL ANSWERING A CALL MISSED CALL NOTIFICATION WAIT/PAUSE FEATURE 2 BASIC OPERATION This chapter addresses and explains the basic features for HOTSHOT TM including: MAKING AN INTERNATIONAL CALL 3-WAY CALLING CALL WAITING FUNCTION CALLING A NUMBER FROM CONTACTS ADJUSTING THE MASTER VOLUME SPEAKERPHONE MODE AVAILABLE OPTIONS DURING A CALL MAKING AN EMERGENCY CALL USING THE DIRECTORY SERVICE

14 TURNING THE PHONE ON AND OFF TURNING THE PHONE ON 1. Press and hold the Power Key until the touchscreen turns on. 2. Enter your 4-digit lock code if the phone is locked. The default lock code is the last 4 digits of your phone number. TURNING THE PHONE OFF 1. Press and hold the Power Key. 2. TURN OFF THE PHONE? is displayed. Tap Yes to turn the phone off. Immediately change or recharge the battery when BATTERY LOW appears on the display. Memory may possibly be damaged if the phone turns off due to the battery completely draining. Turn the phone off before removing or replacing the battery. If the phone is on, unsaved data may be lost. USING THE TOUCHSCREEN The touchscreen of your phone allows you to select items and perform functions. The following finger actions help you easily understand how to use the touchscreen. CAUTION: Do not use sharp tools to avoid scratching the touchscreen. Do not allow the touchscreen to come in contact with water or chemicals. The touchscreen may malfunction in humid conditions or in chemicals. Do not sit on your phone to prevent from damaging the touchscreen. Tap: Tap once to select or access a menu or an option. Tap and hold: Tap an item and hold it for more than 2 seconds to perform functions. Scroll: Tap and drag your finger up, down, left, or right to scroll through items in lists. Drag: Tap and hold your finger on an item and move your finger without losing contact with the screen to move the item. Drag and drop: Tap and drag your finger on an item to select and move it, then lift your finger to drop the item into place. Swipe: Tap and drag your finger list or to another screen

15 USING THE HOME SCREEN Your phone s home screen has three different screens which allow you to access main menus, multimedia shortcuts and favorite contacts. To access the home screen, unlock the screen and press the Home Key. To access another screen, tap the desired screen. ACCESSING MENUS 1. To access Menu mode from the idle screen, unlock the screen. The Menu mode screen automatically appears. 2. Tap the menu you want. 3. Tap Back to move back one level. Press the Home Key to return to the Menu mode screen. USING FAVORITE CONTACTS ACCESSING A SHORTCUT ITEM 1. Unlock the screen. 2. From the Menu mode screen, swipe the screen left to move to the favorite contacts screen. 3. Tap the item you want to access. ADDING CONTACTS 1. From the favorite contacts screen, tap and then tap. 2. Select a contact and tap Add. The selected contact is shown on the screen. DELETING CONTACTS 1. From the favorite contacts screen, tap. 2. Tap Remove. 3. Tap the contact to delete and then tap Remove. SETTING CONTACTS 1. From the favorite contacts screen, tap. 2. Tap Set. 3. Tap a contact. 4. Tap the desired option in the Change to field. USING MULTIMEDIA SHORTCUTS music, pictures, and videos. ACCESSING A SHORTCUT ITEM 1. Unlock the screen. 2. From the Menu mode screen, swipe the screen right to move to the multimedia shortcut screen. 3. Tap the item you want to access

16 ADDING AN ITEM 1. From the multimedia shortcut screen, tap. 2. Tap either My Music, My Pictures, My Videos or Shortcuts. 3. Select an item and tap Add. The selected item is shown on the screen. DELETING AN ITEM 1. From the multimedia shortcut screen, tap. 2. Tap Remove. 3. Tap the item to delete and then tap Remove. 4. Tap Yes to confirm. LOCKING OR UNLOCKING THE TOUCHSCREEN AND KEYS When your phone is unlocked or idle, the touchscreen and keys are automatically locked to prevent any unwanted phone operations. To unlock, tap Drag up to unlock. USING THE TASK MANAGER You can manage multiple applications that are running at the same time. Switch to other applications without closing the current application you are using. 1. Unlock the screen. 2. Press and hold the Home Key to open the Task Manager screen. The list of applications appears. 3. Use the following functions to control applications: To switch to another application, tap the desired application from the list. To close all applications, tap Close All. To return to Menu mode, tap Main Menu. To return to the previous menu, tap Back

17 MENU SUMMARY Main Menu 2 ND Depth 3 RD Depth 4 TH Depth Shop Ringtones My Ringtones Play All Songs All Songs Playlists Music & Tones Artists My Music Genres Albums Manage My Music Music Only Mode My Sounds Media Center V CAST Videos Shop Pictures My Pictures Picture & Video My Videos Take Picture Record Video Online Album Games Mobile Web Browse & Download Extras Text Message New Message Picture Message Video Message Message Voice Message Inbox Sent Drafts Main Menu 2 ND Depth 3 RD Depth 4 TH Depth Voic Call Voic Clear Counter Mobile IM Mobile Mobile Web Mail In Case of Emergency Personal Info Contacts Contact List Voic Directory Assistance My Name Card Recent Calls All Calls Missed Calls Received Calls Dailed Calls Tools Voice Commands Calculator Tip Calculator Calendar Alarm Clock Stop Watch World Clock Unit Converter Notepad USB Mass Storage Airplane Mode Bluetooth Bluetooth Settings Bluetooth Radio Add New Devices Settings Sound Settings Master Volume Ringtones Caller ID Readout Emergency Tone Alert Vibrate Alerts Reminder 30 31

18 Main Menu 2 ND Depth 3 RD Depth 4 TH Depth Power On/Off Sound Unlock Sound Service Alerts Touch Audio Feedback Digit Dial Readout Device Connect Display Settings Wallpaper Banners Main Menu Settings Backlight Timer Backlight Brightness Display Theme Font Type Dial Fonts Menu Font Size Clock Format Touch Settings Touch Vibrate Touch Vibrate Feedback Vibrate Level Confirm Choices Sensitivity Voice Commands Adapt Voice Settings Prompts About Language Phone Settings Location Current Country Edit Codes Restrictions Security Phone Lock Setting Lock Phone Now Restore Phone System Select NAM Select Auto NAM Change NAM Main Menu 2 ND Depth 3 RD Depth 4 TH Depth Call Settings Home Key To Answer Auto Answer with Handsfree Auto Retry TTY Mode Voice Privacy DTMF Tones Assisted Dialing Save Options Pictures Videos Sounds Memory Phone Memory Phone Memory Usage My Pictures My Videos My Ringtones My Music My Sounds My Contacts Move All to Card Card Memory Card Memory Usage My Pictures My Videos My Ringtones My Music My Sounds My Contacts Move All to Phone USB Mode Phone Info My Number SW/HW Version Icon Glossary Software Update Operating System Status Check New 32 33

19 MAKING A CALL 1. Unlock the screen and tap Keypad. 2. Enter an area code and a phone number. To erase one digit at a time, tap. To erase the entire number, tap and hold. 3. Tap to dial the number. To access menus during a call, press the Home Key. 4. To end the call, tap END. If Auto Retry is set to on, the phone will automatically re-dial the number (Refer to page 76). You can also make a call by using the Voice Commands feature. Please refer to page 51 for more details. ANSWERING A CALL 1. When a call comes in, unlock the screen and tap ANSWER. To ignore the incoming call, tap IGNORE. To silence the call ringtone, tap QUIET. 2. To end the call, tap END. If Auto Answer with Handsfree is set to on, an incoming call is answered automatically after a few seconds (Refer to page 76). MISSED CALL NOTIFICATION When an incoming call is not answered, the missed call icon appears on the touchscreen. TO DISPLAY THE MISSED CALL ENTRY FROM THE NOTIFICATION SCREEN: 1. Tap View Now. 2. To check the missed call notification at another time, tap View Later. TO DISPLAY A MISSED CALL ENTRY FROM RECENT CALLS: 1. Unlock the screen and tap Recent Calls. 2. Tap Missed Calls. 3. Select an entry from the list. 4. To dial the phone number, tap. Or, to send a Text, Picture, Video or Voice Message to the caller, tap Send Message. WAIT/PAUSE FEATURE Pauses are used for automated systems (i.e., voic or calling cards). Insert a pause after a phone number and then enter another group of numbers. The second set of numbers is dialed automatically after the pause. This feature is Wait (W) The phone pauses dialing and resumes dialing the next number when you tap. 1. Unlock the screen and tap Keypad. 2. Enter a phone number. 3. Tap More and then tap Wait. 4. Enter the additional number(s). 5. Tap to dial or Save to save the number. 2-Sec Pause (P) The phone waits 2 seconds before sending the next string of digits automatically. 1. Unlock the screen and tap Keypad. 2. Enter a phone number. 3. Tap More and then tap 2-Sec Pause. 4. Enter additional number(s) (pin number or credit card number). 5. Tap to dial or Save to save the number

20 MAKING AN INTERNATIONAL CALL 1. Unlock the phone and tap Keypad. 2. Tap and hold 3. Enter the country code, area code, and phone number, then tap. 4. To end the call, tap END. 3-WAY CALLING With 3-Way Calling, you can talk to two people at the same time. When using this feature, normal airtime rates will be applied for each of the two calls. 1. Unlock the phone and tap Keypad. 2. Enter a phone number and tap. 3. Once you have established the connection, tap Keypad and enter the second phone number you wish to call, and tap. 4. When you re connected to the second party, tap MERGE CALLS to begin your 3-way call. 5. To end the last dialed call, tap END LAST DIALED CALL. To end all calls, tap END ALL CALLS. If one of the people you called hangs up during your call, you and the remaining caller stay connected. If you initiated the call and are the first to hang up, all three calls will be disconnected. CALL WAITING FUNCTION If you are on a call and you receive another incoming call, you will hear a beep and the caller s phone number will appear on the display. With Call Waiting, you may put the active call on hold while you answer the other incoming call. 1. To answer another call while on the phone, tap HOLD CALL AND ANSWER INCOMING. This places the first call on hold. 2. To switch back to the first caller, tap SWAP CALLS. 3. To end all calls, tap END ALL CALLS. CALLING A NUMBER FROM CONTACTS 1. With the phone unlocked, from the Menu mode, tap Contacts. 2. Tap the first letter of the contact name you want, or tap and scroll to a contact from the contact list. 3. Tap to dial the contact number. If the contact has more than two numbers, the default number of the contact will be dialed. ADJUSTING THE MASTER VOLUME 1. With the phone unlocked screen, from the Menu mode, press the Volume Keys up or down. 2. Tap or, or press the Volume Keys up or down to adjust the volume level. To hear the phone s volume, tap Play on the Master Volume menu. 3. Tap Set to save the setting. Press the Volume Keys up or down / to adjust the earpiece volume during a call. SPEAKERPHONE MODE The Speakerphone feature lets you hear audio through the phone speaker and talk without holding the phone. 1. During a call, tap Speaker to activate Speakerphone mode. 2. To deactivate Speakerphone mode, tap Speaker again

21 AVAILABLE OPTIONS DURING A CALL During a phone call, you can access the following options: Mute: Allows you to turn off your phone s microphone so that the other person cannot hear you. Speaker: Allows you to talk and hear through the phone s speaker. Bluetooth: Allows you to use the Bluetooth feature. Keypad: Opens the dial screen. MAKING AN EMERGENCY CALL The E911 feature automatically places the phone in Emergency call mode when you dial the preprogrammed emergency number, 911. It also operates in Lock mode and out of the service area. E911 IN LOCK MODE When you lock the phone by using the Lock Phone Now setting (refer to page 74) or you are out of the service area, to make an emergency call: 1. When Enter Code appears, tap E Tap Yes to dial. The phone maintains Emergency mode for about 5 minutes. When the call ends, the phone returns to Lock mode. E911 USING ANY AVAILABLE SYSTEM To make an emergency call using any available system: 1. With the phone unlocked screen, from the Menu mode, tap Keypad. 2. Enter 911 and tap. 3. The phone will stay in Emergency mode for about 5 minutes. While the phone is in Emergency mode you can receive an incoming call from any available system or you can make outgoing calls even in Emergency callback mode. USING THE DIRECTORY SERVICE You can make a call to the directory service to find out your local numbers. 1. With the phone unlocked screen, from the Menu mode, tap Keypad. 2. Enter 411 and tap
22 3 MEMORY FUNCTION This chapter addresses memory functions including: ENTERING TEXT STORING A PHONE NUMBER EDITING CONTACT ENTRIES BACKUP ASSISTANT TM SENDING A NAME CARD SPEED DIALING
23 ENTERING TEXT You can enter text by using the virtual keypad on your touchscreen. CHANGING THE TEXT INPUT MODE 1. In text entry mode, tap the Add Text field to display the virtual keypad. 2. Change the text input mode - see the chart below. 3. Tap the virtual keys to enter text ENTERING TEXT USING INPUT MODES When entering text with the keypad, you can use the following modes: Mode Function 1. Tap the appropriate virtual keys to enter an entire word. T9 Word 2. When the word displays correctly, tap Space to insert a space and enter the next word. If the correct word does not display, tap the pop-up window and select an alternate word. abc Tap the appropriate virtual keys until the character you want appears on the display. 123 Tap the appropriate virtual keys to enter a number. Symbol Tap the appropriate virtual keys to enter a symbol. ENTERING TEXT USING THE VIRTUAL KEYBOARD You can enter text by using the virtual QWERTY Keyboard. 1. Tap the Add Text field. 2. Rotate the phone counter-clockwise to landscape view. The QWERTY Keyboard screen appears. 3. Enter text as you would use your computer s keyboard. Number Function Switches to T9 Word or ABC mode. When T9 1 Word mode is activated, the the upper left corner of the key turns red. 2 Switches to Number mode. 3 Inserts a space. 4 Changes case. 5 Switches to Symbol mode. 6 Clears the entered characters Number Function 1 Changes case. 2 Switches to Number/Symbol mode. 3 Clears the entered characters. 4 Starts a new line. 5 Inserts a space
24 STORING A PHONE NUMBER The Contact list stores up to 1000 entries. ADDING A NEW CONTACT 1. With the phone unlocked screen, from the Menu mode, tap Keypad. 2. Enter a phone number and tap Save. 3. Tap Add New Contact. Use Update Existing to add another phone number to a contact that is already stored in memory. 4. Select a number type (Mobile/Home/Business/Mobile 2/Fax). 5. Tap the Name field. 6. Enter the contact name and tap Done. 7. Enter additional contact information, if necessary. 8. Tap Save to save the contact. 9. The contact number re-appears on the screen, tap to dial the number. EDITING A CONTACT Once the basic phone number and name information is stored in your Contacts, you can edit the contact information. 1. Unlock the screen and tap Contacts. 2. Tap the desired contact and then tap Edit. 3. Tap the information field you want to edit. 4. Change the data as necessary, then tap Save to update the contact entry. ADDING OR CHANGING GROUPS To organize your Contacts into groups: 1. Unlock the screen and tap Contacts. 2. Tap the desired contact and then tap Edit. 3. Scroll down and tap the Group field. 4. Tap a group and then tap Done. To create a new group, tap New Group and then enter the name and tap Done. 5. Tap Save to update the contact entry. CHANGING THE CALL RINGTONE To identify who is calling by setting different ringtones for different phone numbers in your Contacts: 1. Unlock the screen and tap Contacts. 2. Tap the desired contact and then tap Edit. 3. Scroll down and tap the Ringtone field. 4. Select a ringtone by tapping the ringtone name in the Change to field. 5. Tap Save to update the contact entry. SETTING A PICTURE CALLER ID Picture caller ID displays the picture of the person calling when your phone rings. If the caller s identity is stored with a picture in Contacts, the name and picture appear on the screen. To select a picture to assign to a contact: 1. Unlock the screen and tap Contacts. 2. Tap the desired contact and then tap Edit. 3. Tap the picture frame on the Name field. 4. Tap a picture. 5. Tap Set Picture ID. 6. Tap Save to update the contact entry. ADDING AN ADDRESS To add an address to a contact entry: 1. Unlock the screen and tap Contacts. 2. Tap the desired contact and then tap Edit. 3. Scroll down, and tap Personal or Business
25 4. Enter an address and tap Done. 5. Tap Save to update the contact entry. ADDING A SPEED DIAL ENTRY To add an entry to speed dial: 1. Unlock the screen and tap Contacts. 2. Tap the desired contact and then tap Edit. 3. Scroll down and tap the Speed Dials field. 4. Tap the contact s number you would like to assign, if applicable. 5. Enter the speed dial number you want to set and tap the entered number from the list. You can also tap and select a speed dial number directly from the list. 6. Tap Save update the contact entry. EDITING CONTACT ENTRIES You can edit a contact by changing or deleting a phone number, name, and speed dial number. EDITING A PHONE NUMBER FROM THE DIAL SCREEN 1. Unlock the screen and tap Keypad. 2. Enter the phone number you want to save (up to 32 digits) and tap Save. 3. Tap Update Existing. 4. Tap an existing contact entry. 5. Tap a number type. 6. If the number is already assigned to the type you selected, tap Yes to overwrite the existing entry. 7. Tap Save to update the contact entry. ADDING A PHONE NUMBER FROM THE CONTACT LIST 1. Unlock the screen and tap Contacts. 2. Tap the desired contact and then tap Edit. 3. Tap the number type you want to add. 4. Enter a phone number and tap Done. 5. Tap Save to update the contact entry. EDITING A STORED PHONE NUMBER 1. Unlock the screen and tap Contacts. 2. Tap the desired contact and then tap Edit. 3. Tap the number type you want to edit. 4. Tap and hold and enter a new number, and tap Done. 5. Tap Save to update the contact entry. EDITING A STORED NAME 1. Unlock the screen and tap Contacts. 2. Tap the desired contact and then tap Edit. 3. Tap the Name field. 4. Tap and hold and enter a new name, and tap Done. 5. Tap Save to update the contact entry. DELETING A PHONE NUMBER FROM A CONTACT 1. Unlock the screen and tap Contacts. 2. Tap the desired contact and then tap Edit. 3. Select a number type to be deleted. 4. Tap and hold and tap Done to delete the number. 5. Tap Save to update the contact entry
26 DELETING A CONTACT ENTRY 1. Unlock the screen and tap Contacts. 2. Tap the contact to be deleted. 3. Tap Erase and then tap Yes. DELETING A SPEED DIAL NUMBER 1. Unlock the screen and tap Contacts. 2. Tap More and then tap Speed Dials. 3. Tap the speed dial number to be deleted. 4. Tap Remove and then tap Yes. BACKUP ASSISTANT TM Backup Assistant TM is a wireless service that stores a copy of your Contact list to a secured website. 1. Unlock the screen and tap Contacts. 2. Tap More and then tap Backup Assistant. 3. Follow the on-screen prompts. SENDING A NAME CARD You can send a contact as the name card via message or Bluetooth. 1. Unlock the screen and tap Contacts. 2. Tap More and then tap Send Name Card. 3. Select one of the following sending options: Send via Bluetooth: Allows you to send a name card via Bluetooth. Send via Text Msg: Allows you to send a name card via Text Message. Send via Picture Msg: Allows you to send a name card via Picture Message. Send via Video Msg: Allows you to send a name card via Video Message. Send via Voice Msg: Allows you to send a name card via Voice Message. 4. Tap the desired contact(s) and then tap Done. 5. Tap Add Recipient and select one of the following sending options: From Contacts From Favorites From Recent Calls Enter Number Groups 6. Tap the desired recipient(s) and then tap Done. 7. Tap Send to send the contact as a name card via the selected sending option. SPEED DIALING the virtual keypad with only one or two key taps. To open the dial screen from Menu mode, tap Keypad. 2-9: Tap and hold the number you wish to connect to for more than 1 second. 1 is already assigned for your voic box : Tap the first digit and tap and hold the second digit of the number to dial. 95, 96, 97, 98 and 99: Speed Dial entries 95 (#Warranty Center), 96 (#DATA), 97 (#BAL), 98 (#MIN) and 99 (#PMT) are already assigned for Verizon Wireless Account Information. 411: Speed Dial entry 411 (Directory Assistance) is already assigned
27 4 MENU FUNCTION This chapter addresses accessing the menu and using its functions RECENT CALLS MY VERIZON VOICE COMMANDS CALCULATOR TIP CALCULATOR CALENDAR ALARM CLOCK STOP WATCH and features to customize your HOTSHOT TM WORLD CLOCK UNIT CONVERTER NOTEPAD USB MASS STORAGE AIRPLANE MODE BLUETOOTH SOUND SETTINGS DISPLAY SETTINGS TOUCH SETTINGS PHONE SETTINGS CALL SETTINGS MEMORY USB MODE PHONE INFO
28 RECENT CALLS The Recent Calls menu is a list of the recent phone numbers or Contact entries for calls you placed, accepted, missed, or blocked. It is continually updated as new numbers are added to the beginning of the list and the oldest entries are removed from the bottom of the list. MISSED CALLS Displays information about the most recently missed calls. Place a call to a missed call by simply tapping. 1. Unlock the screen, tap Recent Calls and then tap Missed Calls. 2. Tap the desired call log to view details or tap More to access the options by refering to All Calls. 3. Tap to dial, or tap Send Message to send a message to the number. If the number is not stored in Contacts, tap Save to Contacts to save the number. RECEIVED CALLS Displays information about the most recently received calls. Place a call to a received call by simply tapping. 1. Unlock the screen, tap Recent Calls and then tap Received Calls. 2. Tap the desired call log to view details or tap More to access the options by refering to All Calls. 3. Tap to dial, or tap Send Message to send a message to the number. If the number is not stored in Contacts, tap Save to Contacts to save the number. DIALED CALLS Displays information about the most recently dialed numbers. Place a call to a dialed call by simply tapping. 1. Unlock the screen, tap Recent Calls and then tap Dialed Calls. 2. Tap the desired call log to view details or tap More to access additional options. 3. Tap to dial, or tap Send Message to send a message to the number. If the number is not stored in Contacts, tap Save to Contacts to save the number. BLOCKED CALLS This menu appears only when incoming calls are restricted in the Restrictions menu. 1. Unlock the screen and tap Recent Calls. 2. Tap More and then tap Blocked Calls. 3. Enter the 4-digit lock code. The default lock code is the last 4 digits of your phone number. 4. Select a call log to view details. ALL CALLS Displays information about all of the most recent calls you have received, dialed, and missed. 1. Unlock the screen, tap Recent Calls. The All Calls log is displayed. 2. Tap the desired call log to view details or tap More to access the following options: Sort by: Changes the sort order of call logs. Erase: Deletes a call log or multiple call logs. Erase All: Deletes all call logs. View Timers: Allows you to view the call timers by call type. Blocked Calls: Allows you to view blocked calls, if applicable. 3. From the desired call log, tap to dial, or tap Send Message to send a message to the number. If the number is not stored in Contacts, tap Save to Contacts to save the number
29 MY VERIZON My Verizon allows you to check your account information and get available Verizon services. 1. Unlock the screen and tap My Verizon. 2. When the phone is connected to the My Verizon page, follow the on-screen prompts. VOICE COMMANDS allows you to make calls or use the phone s functions by simply using your voice. All you have to do is to talk into the phone and then the phone will recognize your voice and perform tasks by itself. 1. Unlock the screen, tap Tools and then tap Voice Commands. Shortcut : Unlock the screen and press the Voice Commands Key. 2. The phone displays the Voice Commands menu and prompts you to say the name of the command you want to use. To complete your task, simply follow the voice prompts. You can speak the name of the command. 3. Say or select one of the following commands; Call <Name or #> / Send <MSG Type> / Go To <Menu> / Check <Item> / Contact <Name> / Redial / Play <Playlist> / My Verizon / Help To view information about each option, tap Info. Tap Settings to access voice commands settings. Please refer to page 70 for more details on Voice Commands Settings. 4. When it recognizes one of these commands, the phone launches the associated application. If the phone does not hear a command within a specified time, Voice Commands will turn itself off. CALL <NAME OR #> Use the Call command to voice dial a name from your Contacts or a phone number. When dialing a number, pronounce each digit, but do not pause noticeably between the digits. 1. You will hear Please say a command and the Voice Commands menu will be displayed. 2. If calling a contact from your Contact List, say Call <Name>. Your phone will ask you to confirm the name you said. Say Yes if it was repeated correctly. That phone number will be dialed. If there is more than one number saved for that contact, you will be asked to confirm which number to dial. Examples: Call John Work SEND <MSG TYPE> Use the Send command to send a text or other type of message to a specified name or number. 1. You will hear Please say a command and the Voice Commands menu will be displayed. 2. Say Send followed immediately by one of the following items: Text / Picture / Video / Voice 3. Say the desired contact or group name, or the number of the message recipient. GO TO <MENU> Use the Go To command to open an application on your phone. You can say Go To by itself and be prompted to say the application name, or you can skip the prompt by saying Go To followed by the application name. 1. You will hear Please say a command and the Voice Commands menu will be displayed. 2. Say Go To followed immediately by one of the menus in the list. Examples: Go To Calendar. If no menu option is stated, a list of options will be provided
30 CHECK <ITEM> The Check command lets you check status information for your phone. You can say Check or Check Status to see and hear all status information. 1. You will hear Please say a command and the Voice Commands menu will be displayed. 2. Say Check followed immediately by one of the following items: Status / Voic / Messages / Missed Calls / Time / Signal Strength / Battery Level / Volume / Balance / Minutes / Payment / My Number CONTACT <NAME> Use the Contact command to retrieve and display information for any name stored in your Contact List. 1. You will hear Please say a command and the Voice Commands menu will be displayed. 2. Say Contact <Name> to retrieve and display the contact information: Call / Readout / Create New / Modify / Erase Examples: Contact Bob Smith and follow the voice prompts. REDIAL Use the Redial command to make a call to the last number you dialed. 1. You will hear Please say a command and the Voice Commands menu will be displayed. 2. Say Redial. Your phone will make a call to the last number you dialed. PLAY <PLAYLIST> Say Play followed by a playlist title and then your phone will play back the recognized playlist for you. 1. You will hear Please say a command and the Voice Commands menu will be displayed. 2. Say Play <Playlist> to play back individual playlist or say Play All Songs to play back all songs saved in your phone. MY VERIZON Use the My Verizon command to access information about your Verizon account. 1. You will hear Please say a command and the Voice Commands menu will be displayed. 2. Say My Verizon. Your phone will make a web connection. HELP Use the Help command to view how to use the Voice Commands. 1. You will hear Please say a command and the Voice Commands menu will be displayed. 2. Say Help. The Help guide will be displayed on your phone. CALCULATOR The Calculator allows you to perform simple mathematical calculations. To access the calculator: 1. Unlock the screen, tap Tools and then tap Calculator. 2. Use the virtual keys that correspond to the calculator display to perform basic mathematical operations. 3. To reset the calculator, tap Clear All
31 TIP CALCULATOR Allows you to calculate the tip and determine how much each person should pay for the bill. 1. Unlock the screen, tap Tools and then tap Tip Calculator. 2. Enter the amount in the Total Bill field by using the number keypad. 3. Scroll to the percentage of tip in the % Tip field. The amount of a tip will be displayed in the Tip ($) field. 4. Scroll to the number of attendees in the People field. The amount per each person is shown in the Each field. 5. To reset the tip calculator, tap Reset. CALENDAR The Calendar tool provides easy and convenient access to your schedule. Simply store your appointments and your phone will alert you. CREATING A NEW EVENT 1. Unlock the screen, tap Tools and then tap Calendar. 2. Tap New. 3. Tap the Subject field. 4. Enter the subject and tap Done. 5. Enter the event information by using the following options: Start Date: Enter the starting date of the event. Start Time: Enter the starting time of the event. End Date: Enter the ending date of the event. End Time: Enter the ending time of the event. Recurrence: Sets the recurrence of the event (None/Daily/Every X Days/Weekly/Monthly/ Yearly). Alert Tone: Selects a ringtone for the event alarm. Vibrate: Sets the phone to vibrate for alerting you to the event. Alert Time: Sets the alert time before the event takes place (On Time/15 minutes before/30 minutes before/45 minutes before/1 hour before/3 hours before/5 hours before/1 day before). Reminder: Sets the phone to remind you of the event (Off/Once/Every 2 minutes/every 15 minutes). 6. Tap Save to save the event. The date of the event will be marked as the black triangle on your calendar. VIEWING AN EVENT 1. Unlock the screen, tap Tools and then tap Calendar. 2. Tap a date with a scheduled event. 3. Tap an event to view details. DELETING AN EVENT 1. Unlock the screen, tap Tools and then tap Calendar. 2. Tap a date with a scheduled event. 3. Tap an event to be deleted. 4. Tap More and then tap Erase. 5. Tap Yes to confirm. DELETING ALL EVENTS 1. Unlock the screen, tap Tools and then tap Calendar. 2. Tap More and then tap Erase All. 3. Tap Yes to confirm. DELETING ALL PAST EVENTS Allows you to delete all past events from today. 1. Unlock the screen, tap Tools and then tap Calendar. 2. Tap More and then tap Erase All Old. 3. Tap Yes to confirm
32 ALARM CLOCK The Alarm Clock tool allows you to set up to three alarms. When you set an alarm, the current time is displayed at the top of the screen. When the alarm goes off, ALARM will be displayed on the screen and the alarm will sound. SETTING AN ALARM 1. Unlock the screen, tap Tools and then tap Alarm Clock. 2. Tap an alarm (1, 2, or 3). 3. Set the following options: Set Time: Sets the alarm time. Repeat Once / Daily / Mon - Fri / Weekends). Ringtone: Selects a ringtone for the alarm. 4. Tap Save to save the alarm. The Alarm icon appears on the Menu mode display area. STOPPING AN ALARM When an alarm sounds, Tap Snooze to delay the alarm for an additional 5 minutes. Tap Dismiss to stop the alarm. DEACTIVATING AN ALARM 1. Unlock the screen, tap Tools and then tap Alarm Clock. 2. Tap ON next to the alarm you want to deactivate. You will see the indicator slide to OFF. RESETTING AN ALARM SETTING 1. Unlock the screen, tap Tools and then tap Alarm Clock. 2. Tap an alarm to reset. 3. Tap Reset. 4. Tap Yes to confirm. RESETTING ALL ALARM SETTINGS 1. Unlock the screen, tap Tools and then tap Alarm Clock. 2. Tap Reset All. 3. Tap Yes to confirm. STOP WATCH Simultaneously times up to twenty different events. To operate the stopwatch: 1. Unlock the screen, tap Tools and then tap Stop Watch. 2. Tap Start to start the stopwatch. 3. Tap Lap to record lap times. 4. Tap Stop to the stop recording lap times. 5. Tap Resume to restart recording lap times or tap Reset to clear recorded times. WORLD CLOCK World Clock allows you to view the time in another country and city. VIEWING WORLD CLOCKS 1. Unlock the screen, tap Tools and then tap World Clock. 2. Scroll through the world map and tap a continent. 3. Tap a city. You can also select a city from the list by tapping Cities. SETTING DAYLIGHT SAVING TIME (DST) 1. Unlock the screen, tap Tools and then tap World Clock. 2. Scroll through the world map and tap a continent. 3. Tap a city. You can also select a city from the list by tapping Cities. 4. Tap DST to set the city as Daylight Saving Time
33 UNIT CONVERTER The Unit Converter allows you to convert units of measurement from one to another. 1. Unlock the screen, tap Tools and then tap Unit Converter. 2. Scroll up or down to select the measurement and units of the measurement in the appropriate fields. 3. Enter the value you want to convert from in the From field. As you enter the value, the converted value is shown in the To field. NOTEPAD Your phone includes an internal notepad that can be used to compose and store reminders and notes. CREATING A NEW NOTE 1. Unlock the screen, tap Tools and then tap Notepad. 2. Tap Yes to create a new note. If there are already saved notes, tap New. 3. Enter the note text and tap Done. VIEWING A NOTE 1. Unlock the screen, tap Tools and then tap Notepad. 2. Tap the desired a note to view details. DELETING A NOTE 1. Unlock the screen, tap Tools and then tap Notepad. 2. Tap next to the note you want to delete. 3. Tap Yes to confirm. DELETING ALL NOTES To delete all saved memos: 1. Unlock the screen, tap Tools and then tap Notepad. 2. Tap Erase All. 3. Tap Yes to confirm. USB MASS STORAGE USB Mass Storage allows you to transfer files to or from your PC. In order to use this function, you must insert a microsd TM card. Use this function with the 2GB microsd TM card that is pre-installed in your phone. 1. Connect your phone to a PC with the USB cable. 2. Unlock the screen, tap Tools and then tap USB Mass Storage. 3. When a pop-up window appears on your PC, open a folder to view files. 4. Copy files from the PC to the memory card. AIRPLANE MODE In Airplane mode, all menu functions can be accessed except making calls, receiving calls, data connection and Bluetooth. Activating Airplane mode will disable all wireless communications including Location service. 1. Unlock the screen and tap Settings. 2. Tap OFF next to Airplane Mode. You will see the indicator slide to ON
34 BLUETOOTH Bluetooth technology connectivity enables wireless connections between electronic devices. If connected with a Bluetooth handsfree device, you can use your phone more freely. Since devices with Bluetooth connectivity communicate using radio waves, your phone and the other device do not need to be in direct line-of-sight. The two devices only need to be within 10 meters (30 feet) of each other. The connection can be subject to interference from obstructions such as walls or other electronic devices. This device is compliant with Bluetooth specification 3.0, supporting the following profiles: Dial Up Networking, Handsfree, Headset, Sync, Basic Imaging, Basic Printing, File Transfer, Object Push for vcard, Phonebook Access and Stereo. To ensure interoperability between other devices supporting Bluetooth technology, use approved enhancements for this model. Check with the manufacturers of other devices to determine their compatibility with this phone. There may be restrictions on using Bluetooth technology in some locations. Check with your local authorities or Verizon Wireless. If you want more information on this function, visit the Bluetooth Technology organization Web site: Important: Features using Bluetooth technology, or allowing such features to run in the background while using other features, increase the demand on battery power and reduce the battery life. TURNING ON THE BLUETOOTH FEATURE 1. Unlock the screen and tap Settings. 2. Tap OFF next to Bluetooth. You will see the indicator slide to ON. ADDING A NEW DEVICE Pairing is the process that allows your phone to locate, establish and register a 1-to-1 connection with the target device. 1. Unlock the screen, tap Settings and then tap Bluetooth Settings. 2. Tap Add New Devices. 3. The phone will prompt you with the following message on the screen: Place device you are connecting to in discoverable mode. Tap Next. 4. The device will appear in the Searching for Bluetooth devices... menu. Tap the device you wish to pair with and tap Pair Device. 5. The handset may prompt you for the passkey. Consult the Bluetooth accessory (sold separately) instructions for the appropriate passkey (typically zeroes). Enter the passkey and tap Done. You may not need to input the passkey for pairing when the passkey of the Bluetooth headset or hands-free kit is version, tap Yes without entering the passkey. 6. Tap Always Ask Before Connect if you want the phone to ask you before connecting to the device. 7. Once connected, you will see the device listed in the Bluetooth Settings menu. TRANSFERRING FILES 1. Unlock the screen, tap Settings and then tap Bluetooth Settings. 2. Tap the paired device in the list. 3. With Discovery Mode On for the paired device, select one of the following options: Send Name Card: Allows you to send a contact as the name card. Send Picture: Allows you to send photos to the device. Send Video: Allows you to send videos to the device. Send Calendar Event: Allows you to send calendar events to the device. Get Name Card: Allows you to get name cards from the device. Exchange Name Card: Allows you to send your name card and receive a name card from the device. Browse/Get Files: Allows you to search and get files from the device. 4. Tap the desired file(s) to transfer to or from the device and tap Done, if necessary
Manual de Usario 5U000664C0A REV.00 OM8045US. User Manual
 Manual de Usario 5U0064C0A REV.00 OM85US User Manual User Guide CHAPTER 1. BEFORE USING BEFORE USING...7 HANDSET DESCRIPTIONS...8 KEY DESCRIPTIONS...8 DISPLAY INDICATORS... 12 INSTALL BATTERY... 16 REMOVE
Agustiniano Ciudad Salitre School Computer Science Support Guide - 2015 Second grade First term
 Agustiniano Ciudad Salitre School Computer Science Support Guide - 2015 Second grade First term UNIDAD TEMATICA: INTERFAZ DE WINDOWS LOGRO: Reconoce la interfaz de Windows para ubicar y acceder a los programas,
USER GUIDE USER USER GUIDE USER USER GUIDE GUIDE GUIDE USUARIO USUARIO USUARIO USUARIO GUÍA DEL
 USER USER USER USER GUIDE GUIDE GUIDE GUIDE USER GUIDE USER GUIDE USER GUIDE USER GUIDE 5U0089C0A REV.00 5U0089C0A REV.00 5U0089C0A REV.00 5U0089C0A REV.00 GUÍA DEL GUÍA GUÍA DEL DEL GUÍA DEL USUARIO USUARIO
Get Started All you need to know to get going.
 Get Started All you need to know to get going. Your Device Features LED Indicator Status Bar Icons Front Camera Volume Buttons Display Screen HOME Key MENU Key BACK Key Microphone Power Button Headset
ENGLISH. User Guide LG 305C. www.lg.com MFL68062901 (1.0)
") ENGLISH User Guide LG 305C MFL68062901 (1.0) www.lg.com ENGLISH Screen displays and illustrations may differ from those you see on actual phone. Actual displays and the color of the phone may vary. Some
ENGLISH User Guide LG 305C MFL68062901 (1.0) www.lg.com ENGLISH Screen displays and illustrations may differ from those you see on actual phone. Actual displays and the color of the phone may vary. Some
BWATCH-BT1 SMARTWATCH BLUETOOTH. Manual de Instrucciones
 BWATCH-BT1 SMARTWATCH BLUETOOTH Manual de Instrucciones FUNCIONES Y CONTROLES 1. Altavoz 2. Encendido/Apagado 3. Entrada USB/Auriculares 4. Atrás 5. Botón Home 6. Botón Llamada 7. Micrófono 8. Botón RESET:
MANUAL DE USUARIO CDM8960 CDM8960 CDM8960 OM8960MV 5U000046C0A REV00 USER MANUAL
 CDM8960 MANUAL DE USUARIO CDM8960 OM8960MV 5U000046C0A REV00 CDM8960 USER MANUAL TABLE OF CONTENTS CHAPTER 1. BEFORE USING YOUR PHONE... 5 INSIDE THE PACKAGE... 6 HANDSET DESCRIPTION... 7 THE FUNCTION
Creating your Single Sign-On Account for the PowerSchool Parent Portal
 Creating your Single Sign-On Account for the PowerSchool Parent Portal Welcome to the Parent Single Sign-On. What does that mean? Parent Single Sign-On offers a number of benefits, including access to
USER GUIDE USUARIO GUÍA DEL 5U000588C0A REV.02
 USER GUIDE USER GUIDE GUÍA DEL USUARIO 5U0088C0A REV. User Guide CHAPTER 1. BEFORE USING BEFORE USING...7 INSIDE THE PACKAGE...8 HANDSET DESCRIPTIONS...9 DISPLAY INDICATORS... 12 FEATURE OVERVIEW... 20
User Guide. Usuario. Guía del. User Guide MFL67864401 (1.0) MW. This booklet is printed with soy ink. Printed in Mexico
 MW. This booklet is printed with soy ink. Printed in Mexico") User Guide Guía del Usuario This booklet is made from 60% post-consumer recycled paper. This booklet is printed with soy ink. Printed in Mexico User Guide MFL67864401 (1.0) MW Table of Contents Table
User Guide Guía del Usuario This booklet is made from 60% post-consumer recycled paper. This booklet is printed with soy ink. Printed in Mexico User Guide MFL67864401 (1.0) MW Table of Contents Table
PA600 Rugged Enterprise PDA
 PA600 Rugged Enterprise PDA unitech unitech is a member of Oracle Embedded Software Licensing Program Quick Reference Guide 400577G RevB Front Left View 1 8 7 English 6 3 4 5 1 Status indicator 5 Universal
LG511C LG511C P/NO : MFL67281101 (1.0) H. Printed in Korea
 H. Printed in Korea") LG511C LG511C Printed in Korea P/NO : MFL67281101 (1.0) H Copyright 2011 LG Electronics, Inc. All rights reserved. LG and the LG logo are registered trademarks of LG Group and its related entities. All
LG511C LG511C Printed in Korea P/NO : MFL67281101 (1.0) H Copyright 2011 LG Electronics, Inc. All rights reserved. LG and the LG logo are registered trademarks of LG Group and its related entities. All
Flashcards Series 3 El Aeropuerto
 Flashcards Series 3 El Aeropuerto Flashcards are one of the quickest and easiest ways to test yourself on Spanish vocabulary, no matter where you are! Test yourself on just these flashcards at first. Then,
Steps to Understand Your Child s Behavior. Customizing the Flyer
 Steps to Understand Your Child s Behavior Customizing the Flyer Hello! Here is the PDF Form Template for use in advertising Steps to Understanding Your Child s Behavior (HDS Behavior Level 1B). Because
User Guide. motorola entice W766
 User Guide TM motorola entice W766 congratulations The Motorola Entice W766 does it all. With easy-to-use music player controls, listening to the hottest tracks has never been easier. Take photos and
Nueva confirmación de pedido de compra con cambios: proveedor ES
 Ayuda de trabajo Nueva confirmación de pedido de compra con cambios: proveedor ES Step 1. This Supplier portal activity lists the steps necessary for confirming a new purchase order with changes on price,
USER GUIDE LG505C. Printed in China P/NO : MFL67280901 (1.0) H
 H") USER GUIDE LG505C USER GUIDE LG505C Printed in China P/NO : MFL67280901 (1.0) H Copyright 2012 LG Electronics, Inc. All rights reserved. LG and the LG logo are registered trademarks of LG Group and its
USER GUIDE LG505C USER GUIDE LG505C Printed in China P/NO : MFL67280901 (1.0) H Copyright 2012 LG Electronics, Inc. All rights reserved. LG and the LG logo are registered trademarks of LG Group and its
appkbws03 Wireless Multimedia Keyboard Set Black
 appkbws03 Wireless Multimedia Keyboard Set Black Español 01 English 06 Capítulo 1. Introducción y descripción del producto Gracias por elegir el teclado inalámbrico APPKBWS03. Descripción del producto
BWATCH-BT2B/N SMARTWATCH BLUETOOTH. Manual de Instrucciones
 BWATCH-BT2B/N SMARTWATCH BLUETOOTH Manual de Instrucciones NOTA: Antes de usar el dispositivo instale la aplicación Mediatek SmartDevice desde Google Play: Este dispositivo permite controlar la mayor parte
Printed in China www.lg.com ENGLISH LG 306G. Guía del Usuario. User Guide LG 306G ESPAÑOL. www.lg.com MFL68006601 (1.0)
") Printed in China www.lg.com ENGLISH Guía del Usuario LG 306G ESPAÑOL User Guide LG 306G MFL68006601 (1.0) www.lg.com Congratulations on your purchase of the advanced and compact LG 306G phone by LG, designed
Printed in China www.lg.com ENGLISH Guía del Usuario LG 306G ESPAÑOL User Guide LG 306G MFL68006601 (1.0) www.lg.com Congratulations on your purchase of the advanced and compact LG 306G phone by LG, designed
Puede pagar facturas y gastos periódicos como el alquiler, el gas, la electricidad, el agua y el teléfono y también otros gastos del hogar.
 SPANISH Centrepay Qué es Centrepay? Centrepay es la manera sencilla de pagar sus facturas y gastos. Centrepay es un servicio de pago de facturas voluntario y gratuito para clientes de Centrelink. Utilice
Contents CHAPTER 1. BEFORE USING CDM8950 CHAPTER 2. BASIC OPERATION CHAPTER 3. MEMORY FUNCTION
 CHAPTER 1. BEFORE USING CDM8950 BEFORE USING... 6 INSIDE THE PAC KAGE... 6 HANDSET DESCRIPTIONS... 7 DISPLAY INDICATORS... 9 INSTALL BATTERY... 12 REMOVE BATTERY... 12 CHARGING YOUR BATTERY... 13 BATTERY
Installation Guide. Green momit
 Installation Guide Green momit 2015 www.momit.com momit Deviceses Gateway: Model 1 and 2 Wall option The momit Gateway allows your thermostat to be connected to the Internet. It s included in the Starter
ENGLISH ESPAÑOL. User Guide LG 440G. www.lg.com P/N : MFL67641601 (1.2) Printed in China
 Printed in China") ENGLISH ESPAÑOL User Guide LG 440G Printed in China P/N : MFL67641601 (1.2) www.lg.com LG 440G User Guide Some of the contents of this manual may not apply to your phone depending on your phone s software
ENGLISH ESPAÑOL User Guide LG 440G Printed in China P/N : MFL67641601 (1.2) www.lg.com LG 440G User Guide Some of the contents of this manual may not apply to your phone depending on your phone s software
MANUAL EASYCHAIR. A) Ingresar su nombre de usuario y password, si ya tiene una cuenta registrada Ó
 Ingresar su nombre de usuario y password, si ya tiene una cuenta registrada Ó") MANUAL EASYCHAIR La URL para enviar su propuesta a la convocatoria es: https://easychair.org/conferences/?conf=genconciencia2015 Donde aparece la siguiente pantalla: Se encuentran dos opciones: A) Ingresar
MANUAL EASYCHAIR La URL para enviar su propuesta a la convocatoria es: https://easychair.org/conferences/?conf=genconciencia2015 Donde aparece la siguiente pantalla: Se encuentran dos opciones: A) Ingresar
www.lg.com Printed in China ENGLISH LG 441G Guía del Usuario User Guide LG 441G www.lg.com ESPAÑOL MFL68762201 (1.0)
") Printed in China www.lg.com ENGLISH Guía del Usuario LG 441G User Guide LG 441G www.lg.com ESPAÑOL MFL68762201 (1.0) LG 441G User Guide Screen displays and illustrations may differ from those you see
Printed in China www.lg.com ENGLISH Guía del Usuario LG 441G User Guide LG 441G www.lg.com ESPAÑOL MFL68762201 (1.0) LG 441G User Guide Screen displays and illustrations may differ from those you see
2. Under user name, use your Panther ID (Same as Maximo) Use el Panther ID en la seccion que dice User Name (El mismo de Maximo)
 Use el Panther ID en la seccion que dice User Name (El mismo de Maximo)") 1. After opening the application the screen should always look like this one: Despues de abrir la aplicacion, la pantalla deberia de lucir exactamente de la siguiente manera: (Note: If you see a green
1. After opening the application the screen should always look like this one: Despues de abrir la aplicacion, la pantalla deberia de lucir exactamente de la siguiente manera: (Note: If you see a green
o i r a u s U l e d a í u User Guide MOTO
 User Guide MOTO VU204 pwr/end HELLOMOTO Introducing your new MOTO VU204 CDMA wireless phone! It s a hot-looking phone that s affordable and easy to use. Here s a quick anatomy lesson: Open menus. Directional
ENGLISH ESPAÑOL. User Guide LG 440G. www.lg.com P/N : MFL67641601 (1.0) Printed in China
 Printed in China") ENGLISH ESPAÑOL User Guide LG 440G Printed in China P/N : MFL67641601 (1.0) www.lg.com LG 440G User Guide Some of the contents of this manual may not apply to your phone depending on your phone s software
ENGLISH ESPAÑOL User Guide LG 440G Printed in China P/N : MFL67641601 (1.0) www.lg.com LG 440G User Guide Some of the contents of this manual may not apply to your phone depending on your phone s software
Portal para Padres CPS - Parent Portal. Walter L. Newberry Math & Science Academy Linda Foley-Acevedo, Principal Ed Collins, Asst.
 Portal para Padres CPS - Parent Portal Walter L. Newberry Math & Science Academy Linda Foley-Acevedo, Principal Ed Collins, Asst. Principal (773) 534-8000 Formando su cuenta - Setting up your account Oprima
Vermont Mini-Lessons: Leaving A Voicemail
 Vermont Mini-Lessons: Leaving A Voicemail Leaving a Voice Mail Message Learning Objective 1) When to leave a message 2) How to leave a message Materials: 1) Voice Mail Template blanks & samples 2) Phone
Zune 8GB/4GB Start. Iniciar.
 Zune 8GB/4GB Start. Iniciar. SETUP 1 Visit www.zune.net/setup to install the Zune software. 2 When installation is complete, connect your Zune to your PC to start syncing. Your Zune charges whenever
GT360 User guide. English/Spanish. LG Electronics Inc. MMBB0345201 (1.0)H
H") LG Electronics Inc. MMBB0345201 (1.0)H GT360 User guide LG Electronics Inc. English/Spanish GT360 User guide Some of the contents in this manual may differ from your phone depending on the software of
LG Electronics Inc. MMBB0345201 (1.0)H GT360 User guide LG Electronics Inc. English/Spanish GT360 User guide Some of the contents in this manual may differ from your phone depending on the software of
TLC 3 Student Mobile Device Configuration Specifications
 TLC 3 Student Mobile Device Configuration Specifications All students are REQUIRED to configure and maintain their mobile devices as outlined in this document. Non-compliance is a violation of District
KX-TG9581 KX-TG9582. Setup Guide for Telephone Plug-in. Telephone Plug-in for Microsoft Outlook. Model No.
 Telephone Plug-in for Microsoft Outlook Model No. KX-TG9581 KX-TG9582 Thank you for purchasing a Panasonic product. This document explains how to use the Telephone Plug-in for Microsoft Outlook. For information
Introducing your new MOTOKRZR K1 GSM wireless phone. Here s a quick anatomy lesson.
 HELLOMOTO Introducing your new MOTOKRZR K1 GSM wireless phone. Here s a quick anatomy lesson. Open menu and select. Right Soft Key Scroll up, down, left, or right. Left Soft Key Clear/Back Key Voice Command
INSTRUCCIONES PARA ENVIAR SU PELICULA PARA LA VIDEOLIBRERIA
 For English version, please scroll down to page 11 (eleven) INSTRUCCIONES PARA ENVIAR SU PELICULA PARA LA VIDEOLIBRERIA Especificaciones técnicas Container format:.mp4 / tamaño de archivo no superior a
QUICK START GUIDE. English - CJB1LK201AAA Printed in China SAVE PAPER SAVE TREES PLEASE CONSIDER THE ENVIRONMENT BEFORE PRINTING
 QUICK START GUIDE SAVE PAPER SAVE TREES PLEASE CONSIDER THE ENVIRONMENT BEFORE PRINTING English - CJB1LK201AAA Printed in China 1 Your Mobile Keys and connectors Camera Front flashlight LED indicator Volume
Save Money 2-up Single Doorhanger Set OH payday advance edition, 4 different doorhangers, Spanish
 Save Money 2-up Single Doorhanger Set OH payday advance edition, 4 different doorhangers, Spanish PACKAGE CONTENTS How to Customize 4-color doorhanger, Editable PDF (50% OFF first loan) 1-color (black)
Quick Installation Guide Internet Setup
 CBR-970 Wireless-N Broadband Router www.cnet.com.tw Established in California, U.S.A. since 1987 Quick Installation Guide Internet Setup What s included in the box CBR-970 Wireless N Broadband Router Quick
User Guide. Some of the contents in this manual may differ from your phone depending on the software of the phone or your service provider.
 User Guide Some of the contents in this manual may differ from your phone depending on the software of the phone or your service provider. TM MOTOKRZR K1 HELLOMOTO Introducing your new MOTOKRZR K1 GSM
EP-2906 Manual de instalación
 EP-2906 Manual de instalación Con el botón situado a la izquierda se configura en el modo de cliente y de la derecha es el modo de Punto de acceso AP (nota: El USB es sólo para la función de fuente de
Ready. Set. Go. Vonage Box. Quick Start Guide
 Ready. Set. Go. TM Vonage Box Quick Start Guide Start here. Congratulations and welcome to Vonage! Now that you have your Vonage Box TM, it s time to enjoy exceptional home phone service, including a wide
V710 CDMA START HERE >
 V710 CDMA START HERE > Welcome Welcome to the world of Motorola digital wireless communications! We are pleased that you have chosen the Motorola V710 CDMA wireless phone. Left Soft Key Perform functions
Instructions on How to Access and Print Your W2 Statement for Active or Terminated Employees
 Instructions on How to Access and Print Your W2 Statement for Active or Terminated Employees SUBJECT: ACCESSING AND PRINTING YOUR W2 STATEMENT AS AN ACTIVE EMPLOYEE PURPOSE: This document outlines the
Brief Introduction to Docking and Virtual Screening with Autodock4 and Autodock Tools
 Brief Introduction to Docking and Virtual Screening with Autodock4 and Autodock Tools Environment set up Launch AutoDock Tools Gui. Aplicaciones --> MGLTools-1.5.4 --> AutoDockTools-1.5.4 You should see
Sierra Security System
 Using Your SpreadNet Accessories With Your Sierra Security System Uso de Sus Accesorios SpreadNet Con Su Sistema de Seguridad Sierra SN990-KEYPAD SN961-KEYFOB SN991-REMOTE 1 SN990-KEYPAD The SN990-KEYPAD
HELLOMOTO. Introducing your new MOTORIZR Z6tv CDMA wireless phone!
 TM MOTORIZR Z6tv HELLOMOTO Introducing your new MOTORIZR Z6tv CDMA wireless phone! Never Miss atv Show Whether it s news, sports, or your favorite show, watch live TV in the palm of your hand. Or, download
School Preference through the Infinite Campus Parent Portal
 School Preference through the Infinite Campus Parent Portal Welcome New and Returning Families! Enrollment for new families or families returning to RUSD after being gone longer than one year is easy.
This booklet is printed with soy ink. Printed in Mexico USER GUIDE. This booklet is made from 60% post-consumer recycled paper.
 This booklet is made from 60% post-consumer recycled paper. This booklet is printed with soy ink. Printed in Mexico USER GUIDE GUÍA DEL USUARIO USER GUIDE MFL67402301(1.0)H Copyright 2011 LG Electronics,
Some of the contents in this manual may differ from your phone depending on the software of the phone. Actual color may vary.
 User Guide Some of the contents in this manual may differ from your phone depending on the software of the phone. Actual color may vary. Your phone is designed to make it easy for you to access a wide
User s Guide W755 V C A S T PH O N E
 User s Guide W755 V C A S T PH O N E HELLOMOTO Introducing your new MOTO W755 CDMA wireless phone! Connect on So Many Levels Whether it s with work or friends, connect in all kinds of ways voice, messaging,
V365 GSM English. motorola.com
 V365 GSM English motorola.com HELLOMOTO Introducing your new Motorola V365 GSM wireless phone. Here s a quick anatomy lesson. Open menus. Navigate menus. Select menu items. Left Soft Key Volume Keys PTT/Smart
Welcome. Welcome to the world of Motorola digital wireless communications! We are pleased that you have chosen the Motorola V330 GSM wireless phone.
 V330 GSM Welcome Welcome to the world of Motorola digital wireless communications! We are pleased that you have chosen the Motorola V330 GSM wireless phone. Headset Jack Menu Key Left Soft Key Perform
V325 CDMA English. motorola.com
 V325 CDMA English motorola.com Welcome We are pleased that you have chosen the Motorola V325 wireless phone. Left Soft Key Right Soft Key Camera Key Send Key Make & answer calls. Volume Keys Speakerphone
Printed in China. This booklet is made from 60% post-consumer recycled paper. USER GUIDE USUARIO GUÍA DEL
 This booklet is made from 60% post-consumer recycled paper. Printed in China. USER GUIDE GUÍA DEL USUARIO MMBB0392701(1.0) H Copyright 2010 LG Electronics, Inc. All rights reserved. LG OCTANE TM is registered
150Mbps Micro Wireless N USB Adapter
 150Mbps Micro Wireless N USB Adapter TEW-648UBM ŸGuía de instalación rápida (1) ŸTroubleshooting (5) 1.11 1. Antes de iniciar Contenidos del paquete ŸTEW-648UBM ŸCD-ROM (herramienta y guía del usuario)
Guía de instalación rápida TE100-P1U
 Guía de instalación rápida TE100-P1U V2 Table of Contents Español 1 1. Antes de iniciar 1 2. Cómo se instala 2 3. Configuración del servidor de impresora 3 4. Añadir la impresora a su PC 5 Troubleshooting
USER GUIDE USUARIO GUÍA DEL USER GUIDE 5U000436C0A REV.00 OM8035PP
 USER GUIDE GUÍA DEL USUARIO USER GUIDE 5U0036C0A REV.00 OM85PP User Guide CHAPTER 1. BEFORE USING BEFORE USING...8 HANDSET DESCRIPTIONS...8 DISPLAY INDICATORS...12 INSTALL BATTERY...16 REMOVE BATTERY...17
Video Server. Quick Installation Guide. English, Español
 Video Server Quick Installation Guide English, Español 2 Video Server NOTES Quick Installation Guide 3 Video Server Quick Installation Guide To get your Video Server up and running on an Ethernet network,
This booklet is printed with soy ink. Printed in Mexico. This booklet is made from 60% post-consumer recycled paper. USER GUIDE USUARIO GUÍA DEL
 This booklet is made from 60% post-consumer recycled paper. This booklet is printed with soy ink. Printed in Mexico USER GUIDE GUÍA DEL USUARIO MFL67107801(1.0) G Copyright 2011 LG Electronics, Inc. All
Crear alarma GATE. Aparecerá una ventana emergente para crear alarma.
 Crear alarma GATE Para crear una alarma, accede a través del menú principal de myhome.wattio.com a Seguridad, posteriormente arriba a la derecha haz click en Alarmas. En esta pantalla, en el menú izquierdo,
WebForms con LeadTools
 WebForms con LeadTools 21.01.2007 Danysoft Con la aparición de la version 15 de LEADTOOLS, LEAD ha incluido un control.net para la gestión de formularios en la Web. A continuación le incluimos unas instrucciones
MANUAL DE INSTRUCCIONES TELÉFONO MÓVIL DUAL SIM BTM-4-N-A-O-Y
 MANUAL DE INSTRUCCIONES TELÉFONO MÓVIL DUAL SIM BTM-4-N-A-O-Y INICIO Abra el compartimento de batería, inserte una tarjeta SIM, inserte la batería. Conecte el dispositivo para cargar la betería. Una vez
Quick Start Guide Guía de inicio rápido
 Quick Start Guide Guía de inicio rápido Your phone at a glance Thank you for choosing the HUAWEI SnapTo. Before you start, let's take a look at your new phone. Press the power button to turn on or turn
HELLOMOTO. Introducing your new MOTORAZR maxx Ve CDMA wireless phone. Here s a quick anatomy lesson. Two-stage Shutter Release Key.
 HELLOMOTO Introducing your new MOTORAZR maxx Ve CDMA wireless phone. Here s a quick anatomy lesson. Left Soft Key Volume Keys 1 N Two-stage Shutter Release Key Right Soft Key Clear/Back Key Music Player
Guía de instalación rápida TFM-561U
 Guía de instalación rápida TFM-561U V1 Table of Contents Español 1 1. Antes de iniciar 1 2. Cómo se instala 2 Troubleshooting 5 Version 08.25.2010 1. Antes de iniciar Contenidos del paquete TFM-561U CD-ROM
EN / ES Airtribune Live tracking Instructions
 Airtribune Live tracking Instructions 1. Activate the desired service plan: Personal GSM live tracking with pilots devices Personal GSM & satellite tracking GSM tracking with rented of own tracker set.
Welcome to Smart Start Network/ Bienvenidos a Smart Start Network
 Welcome to Smart Start Network/ Bienvenidos a Smart Start Network Go to the College homepage at http://www.epcc.edu. When you click in the box that says Quick Login a menu will drop down. Click on Smart
We are pleased that you have chosen the Motorola V325i wireless phone. Right Soft Key Headset Jack. CLR Key Clear entries, move back through menus.
 Welcome We are pleased that you have chosen the Motorola V325i wireless phone. Left Soft Key Right Soft Key Headset Jack Camera Key Send Key Make & answer calls. Volume Keys Speakerphone Key CLR Key Clear
MOTORAZR V3m CDMA English. motorola.com
 MOTORAZR V3m CDMA English motorola.com HELLOMOTO Introducing your new MOTORAZR V3m wireless phone. Here s a quick anatomy lesson. Smart/ Speakerphone Key Volume Keys Left Soft Key Perform function in
Printed in Korea LG L85C GUÍA DEL USUARIO USER GUIDE LG L85C P/NO : MFL67343401 (1.0) G
 G") GUÍA DEL USUARIO LG L85C Printed in Korea USER GUIDE LG L85C USER GUIDE LG L85C P/NO : MFL67343401 (1.0) G Copyright 2011 LG Electronics, Inc. All rights reserved. LG and the LG logo are registered trademarks
GUÍA DEL USUARIO LG L85C Printed in Korea USER GUIDE LG L85C USER GUIDE LG L85C P/NO : MFL67343401 (1.0) G Copyright 2011 LG Electronics, Inc. All rights reserved. LG and the LG logo are registered trademarks
User Guide. motorola rapture V C A S T PH ON E VU30
 User Guide TM motorola rapture VU30 V C A S T PH ON E HELLOMOTO Introducing your new Motorola Rapture TM VU30 wireless phone! It s sleek, stylish, and sure to get you noticed. Check out these features:
Quick Installation Guide TU2-DVIV H/W: V1.0R
 Quick Installation Guide TU2-DVIV H/W: V1.0R Table Table of Contents of Contents Español... 1. Antes de iniciar... 2. Cómo se instala... 1 1 3 Troubleshooting... 6 Version 06.27.2008 1. Antes de iniciar
User Guide Manual del Usuario
 User Guide Manual del Usuario Nokia 6030 User Guide Nota: La traducción en español de este manual inicia en la Página 65. 9241289 Issue 3 1 DECLARATION OF CONFORMITY Hereby, NOKIA CORPORATION, declares
QUICK REFERENCE GUIDE GUÍA DE REFERENCIA RÁPIDA. English... 1 Español... 97
 QUICK REFERENCE GUIDE GUÍA DE REFERENCIA RÁPIDA English.............................................................. 1 Español............................................................ 97 CONTENTS
Nokia 6012, Nokia 6015, Nokia 6015i, and Nokia 6019i User Guide
 User Guide Nokia 6012, Nokia 6015, Nokia 6015i, and Nokia 6019i User Guide 931169X26 Issue 1 1 Copyright Nokia 2004 Part No. 9311692, Issue No. 1 Copyright 2004 Nokia. All rights reserved. Nokia, Nokia
User Guide Manual del Usuario
 User Guide Manual del Usuario Nokia 6305i User Guide Nota: La traducción en español de este manual inicia en la Página 63. 1 LEGAL INFORMATION PART NO. 9242631, ISSUE NO. 1a Printed in Korea 02/2006 Copyright
C610. User Guide. Guía del usuario C610. PANTECH C610 User Guide 5U000081C0A REV00
 5U000081C0A REV00 Some of the contents in this manual may differ from your phone depending on the software of the phone or your service provider. 2007 AT&T Knowledge Ventures. All rights reserved. Subsidiaries
Sesión 3: PL 2b: Sistema para la adquisición de señales analógicas.
 Sesión 3: PL 2b: Sistema para la adquisición de señales analógicas. 1 Objetivo... 3 Signal Logging Basics... 3 Configure File Scope (xpc) Blocks... 3 File Scope Usage... 4 Create File Scopes Using xpc
User Guide. motorola adventure V750 V C A S T PH ON E
 User Guide TM motorola adventure V750 V C A S T PH ON E HELLOMOTO Introducing your new motorola adventure TM V750 CDMA wireless phone! It s rugged and full of high performance features: Instant Communication
Experience SprintSpeed. Everything you want right on your phone.
 Experience SprintSpeed. Everything you want right on your phone. Speed is beautiful. It s an exciting time: With a device that fits in your pocket, Sprint lets you connect with friends, listen to your
Online User s Guide. Dual-Band PCS Phone SCP-4900
 Online User s Guide Dual-Band PCS Phone SCP-4900 Table of Contents Welcome to Sprint...........................................1 Introduction to this Online User s Guide.....................3 SECTION 1:
FRANÇAIS ESPAÑOL ENGLISH. Operating Manual. ClearSounds A600 DECT 6.0 Amplified Freedom Phone with Full ClearDigital Power 1 ENGLISH
 FRANÇAIS ESPAÑOL ENGLISH Operating Manual ClearSounds A600 DECT 6.0 Amplified Freedom Phone with Full ClearDigital Power 1 ENGLISH TABLE OF CONTENTS PRIOR TO USE Pg. 4... Congratulations Pg. 5-6... Important
Welcome to lesson 2 of the The Spanish Cat Home learning Spanish course.
 Welcome to lesson 2 of the The Spanish Cat Home learning Spanish course. Bienvenidos a la lección dos. The first part of this lesson consists in this audio lesson, and then we have some grammar for you
Wi-Fi HD Camera Quick Setup Guide
 Wi-Fi HD Camera Quick Setup Guide What s Included First Alert HD IP Camera Unit Power Cord Ethernet Cable Camera Software CD Removable Antenna Mounting Bracket and Hardware Quick Setup Guide Initial Camera
LG160 LG160 USER GUIDE MANUAL DEL USUARIO. Guárdelo para consultarlo en el futuro. Lea este manual cuidadosamente antes de utilizar su teléfono.
 Lea este manual cuidadosamente antes de utilizar su teléfono. Guárdelo para consultarlo en el futuro. LG160 ENGLISH LG160 MANUAL DEL USUARIO USER GUIDE LG160 USER GUIDE Please read this manual carefully
Recordatorio de inicio de sesión Iniciar sesión Finalizar sesión
 Instructions ENGLISH Instrucciones ESPAÑOL This document is to help consumers in understanding basic functionality in their own language. Should you have any difficulty using any of the functions please
Lump Sum Final Check Contribution to Deferred Compensation
 Memo To: ERF Members The Employees Retirement Fund has been asked by Deferred Compensation to provide everyone that has signed up to retire with the attached information. Please read the information from
Unimax MAXBravo User Manual
 Unimax MAXBravo User Manual U670C Accessories available at www.unimaxmobile.com U670CUG Conventions used in this guide In this user guide, we use the following symbols to indicate useful and important
MOTORAZR TM V3 GSM English. motorola.com
 MOTORAZR TM V3 GSM English motorola.com Welcome Welcome to the world of Motorola digital wireless communications! We are pleased that you have chosen the MOTORAZR TM V3 GSM wireless phone. Smart Key Volume
IE12_ CONSOLIDACIÓN Y DESARROLLO DE NUEVAS TÉCNICAS DE EVALUACIÓN INTENSIVAS ON-LINE YA IMPLEMENTADAS POR EL GIE E4
 IE12_13-03001 - CONSOLIDACIÓN Y DESARROLLO DE NUEVAS TÉCNICAS DE EVALUACIÓN Departamento de Estructuras de la Edificación Escuela Técnica Superior de Arquitectura de Madrid Universidad Politécnica de Madrid
Nokia 6030 User Guide
 6030_EN_ESv.1_BIL_UG_9241289.book Page 1 Tuesday, September 20, 2005 5:06 PM Nokia 6030 User Guide Nota: La traducción en español de este manual inicia en la Página 65. 9241289 Issue 1 1 6030_EN_ESv.1_BIL_UG_9241289.book
ENGLISH ESPAÑOL. User Guide LG 840G. www.lg.com
 ENGLISH ESPAÑOL User Guide LG 840G Printed in China P/NO : MFL67580401(1.0) www.lg.com Congratulations on your purchase of the advanced and compact LG 840G phone by LG, designed to operate with the latest
SFD-200-N-B DESPERTADOR-PROYECTOR-CON VOZ. Manual de instrucciones
 SFD-200-N-B DESPERTADOR-PROYECTOR-CON VOZ Manual de instrucciones Funciones: - Proyección de la hora - Proyección controlada por sonidos y vibraciones (palmada, etc.) - Pantalla retroiluminada azul - Hora
Manual de Instrucciones
 BSPORT-10-N-R-V-A PULSERA DEPORTIVA-BLUETOOTH Manual de Instrucciones FUNCIONES Y CONTROLES Pulsar el botón de encendido durante 3 segundos para encender el dispositivo. BATERÍA El dispositivo cuenta con
TELÉFONO V CAST. User Guide. Guía del Usuario V CAST MUSIC PHONE
 Guía del Usuario TELÉFONO V CAST USER GUIDE User Guide MMBB0000000(1.0) KW V CAST MUSIC PHONE Copyright 2008 LG Electronics, Inc. All rights reserved. LG and the LG logo are registered trademarks of LG
MANUAL BREVE DE INSTRUCCIONES PARA INSTALAR EL BLOQUE DE VIDEOCONFERENCIA EN MOODLE
 MANUAL BREVE DE INSTRUCCIONES PARA INSTALAR EL BLOQUE DE VIDEOCONFERENCIA EN MOODLE AUTOR: Dr. Agustín Rico Guzmán ENSEÑANZA MEDICA CAR Zamora Michoacán México REQUISITOS BLOQUE DE VIDECONFERENCIA EN MOODLE,
MMBB0146901(1.0) G. User Guide
 G. User Guide") 2:15 PM Page 1 VX4650 User Guide Manual del usuario 05/4/28 VX4650 VX4650_cover_1.0.qxd MMBB0146901(1.0) G User Guide VX4650 Important Safety Precautions Read these simple guidelines. Breaking the rules
2:15 PM Page 1 VX4650 User Guide Manual del usuario 05/4/28 VX4650 VX4650_cover_1.0.qxd MMBB0146901(1.0) G User Guide VX4650 Important Safety Precautions Read these simple guidelines. Breaking the rules